My Personal Projects
Wooden Hexagons LED Light Project
- Wooden Hexagons LED Light Project
- Introduction
- Materials List
- Tools Required
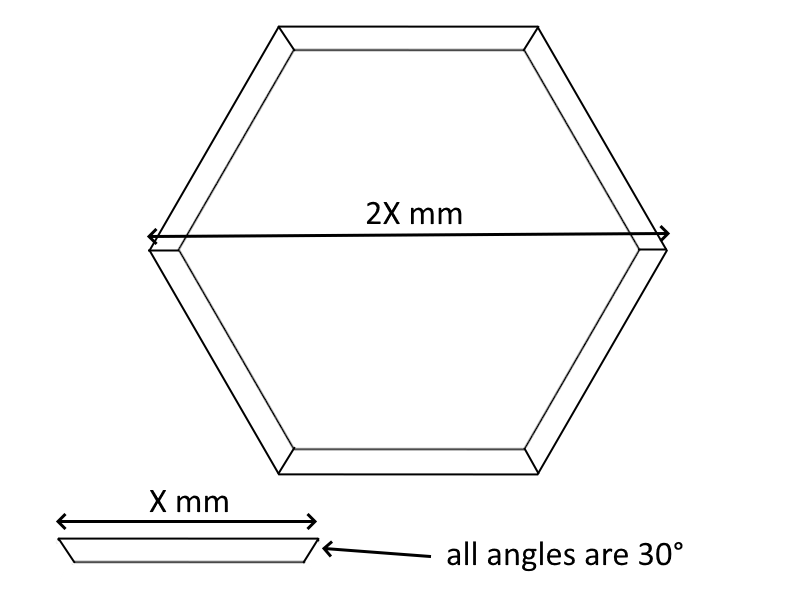
- Size of the hexagon
- Construction Guide
- Step 1: Designing the Hexagons
- Step 2: Cutting the Wood
- Step 3: Assembling the Hexagon Frames
- Step 4: Preparing the Backplate
- Step 5: Putting it together
- Step 6: Attaching the LED Strip
- Step 7: Attach matte transparent paper
- In action
Introduction
This guide details how to create wooden hexagons illuminated by WS2812 LED lights.
Materials List
- WS2812 LED Strips
- Wooden planks (suitable for cutting into hexagons)
- Miter saw (set to a 30-degree angle for cutting)
- Wood glue (for assembling the hexagons)
- Backplate material (e.g., thin plywood)
- Soldering iron and solder
- Wire (for connecting LED strips)
- Paint for wood (optional)
Tools Required
- Saw (for cutting the backplates)
- Wire cutters and strippers
Size of the hexagon
If you use 100mm long pieces for the sides, your hexagon in the end will be 200mm wide.
Construction Guide
Building hexagons is quite simple. All you need to do is create 6 equal pieces with a trapezoid shape having 30° sides.
When using a miter saw, follow the below steps to guarantee a successful result!
Step 1: Designing the Hexagons
Plan out the size and number of hexagons.
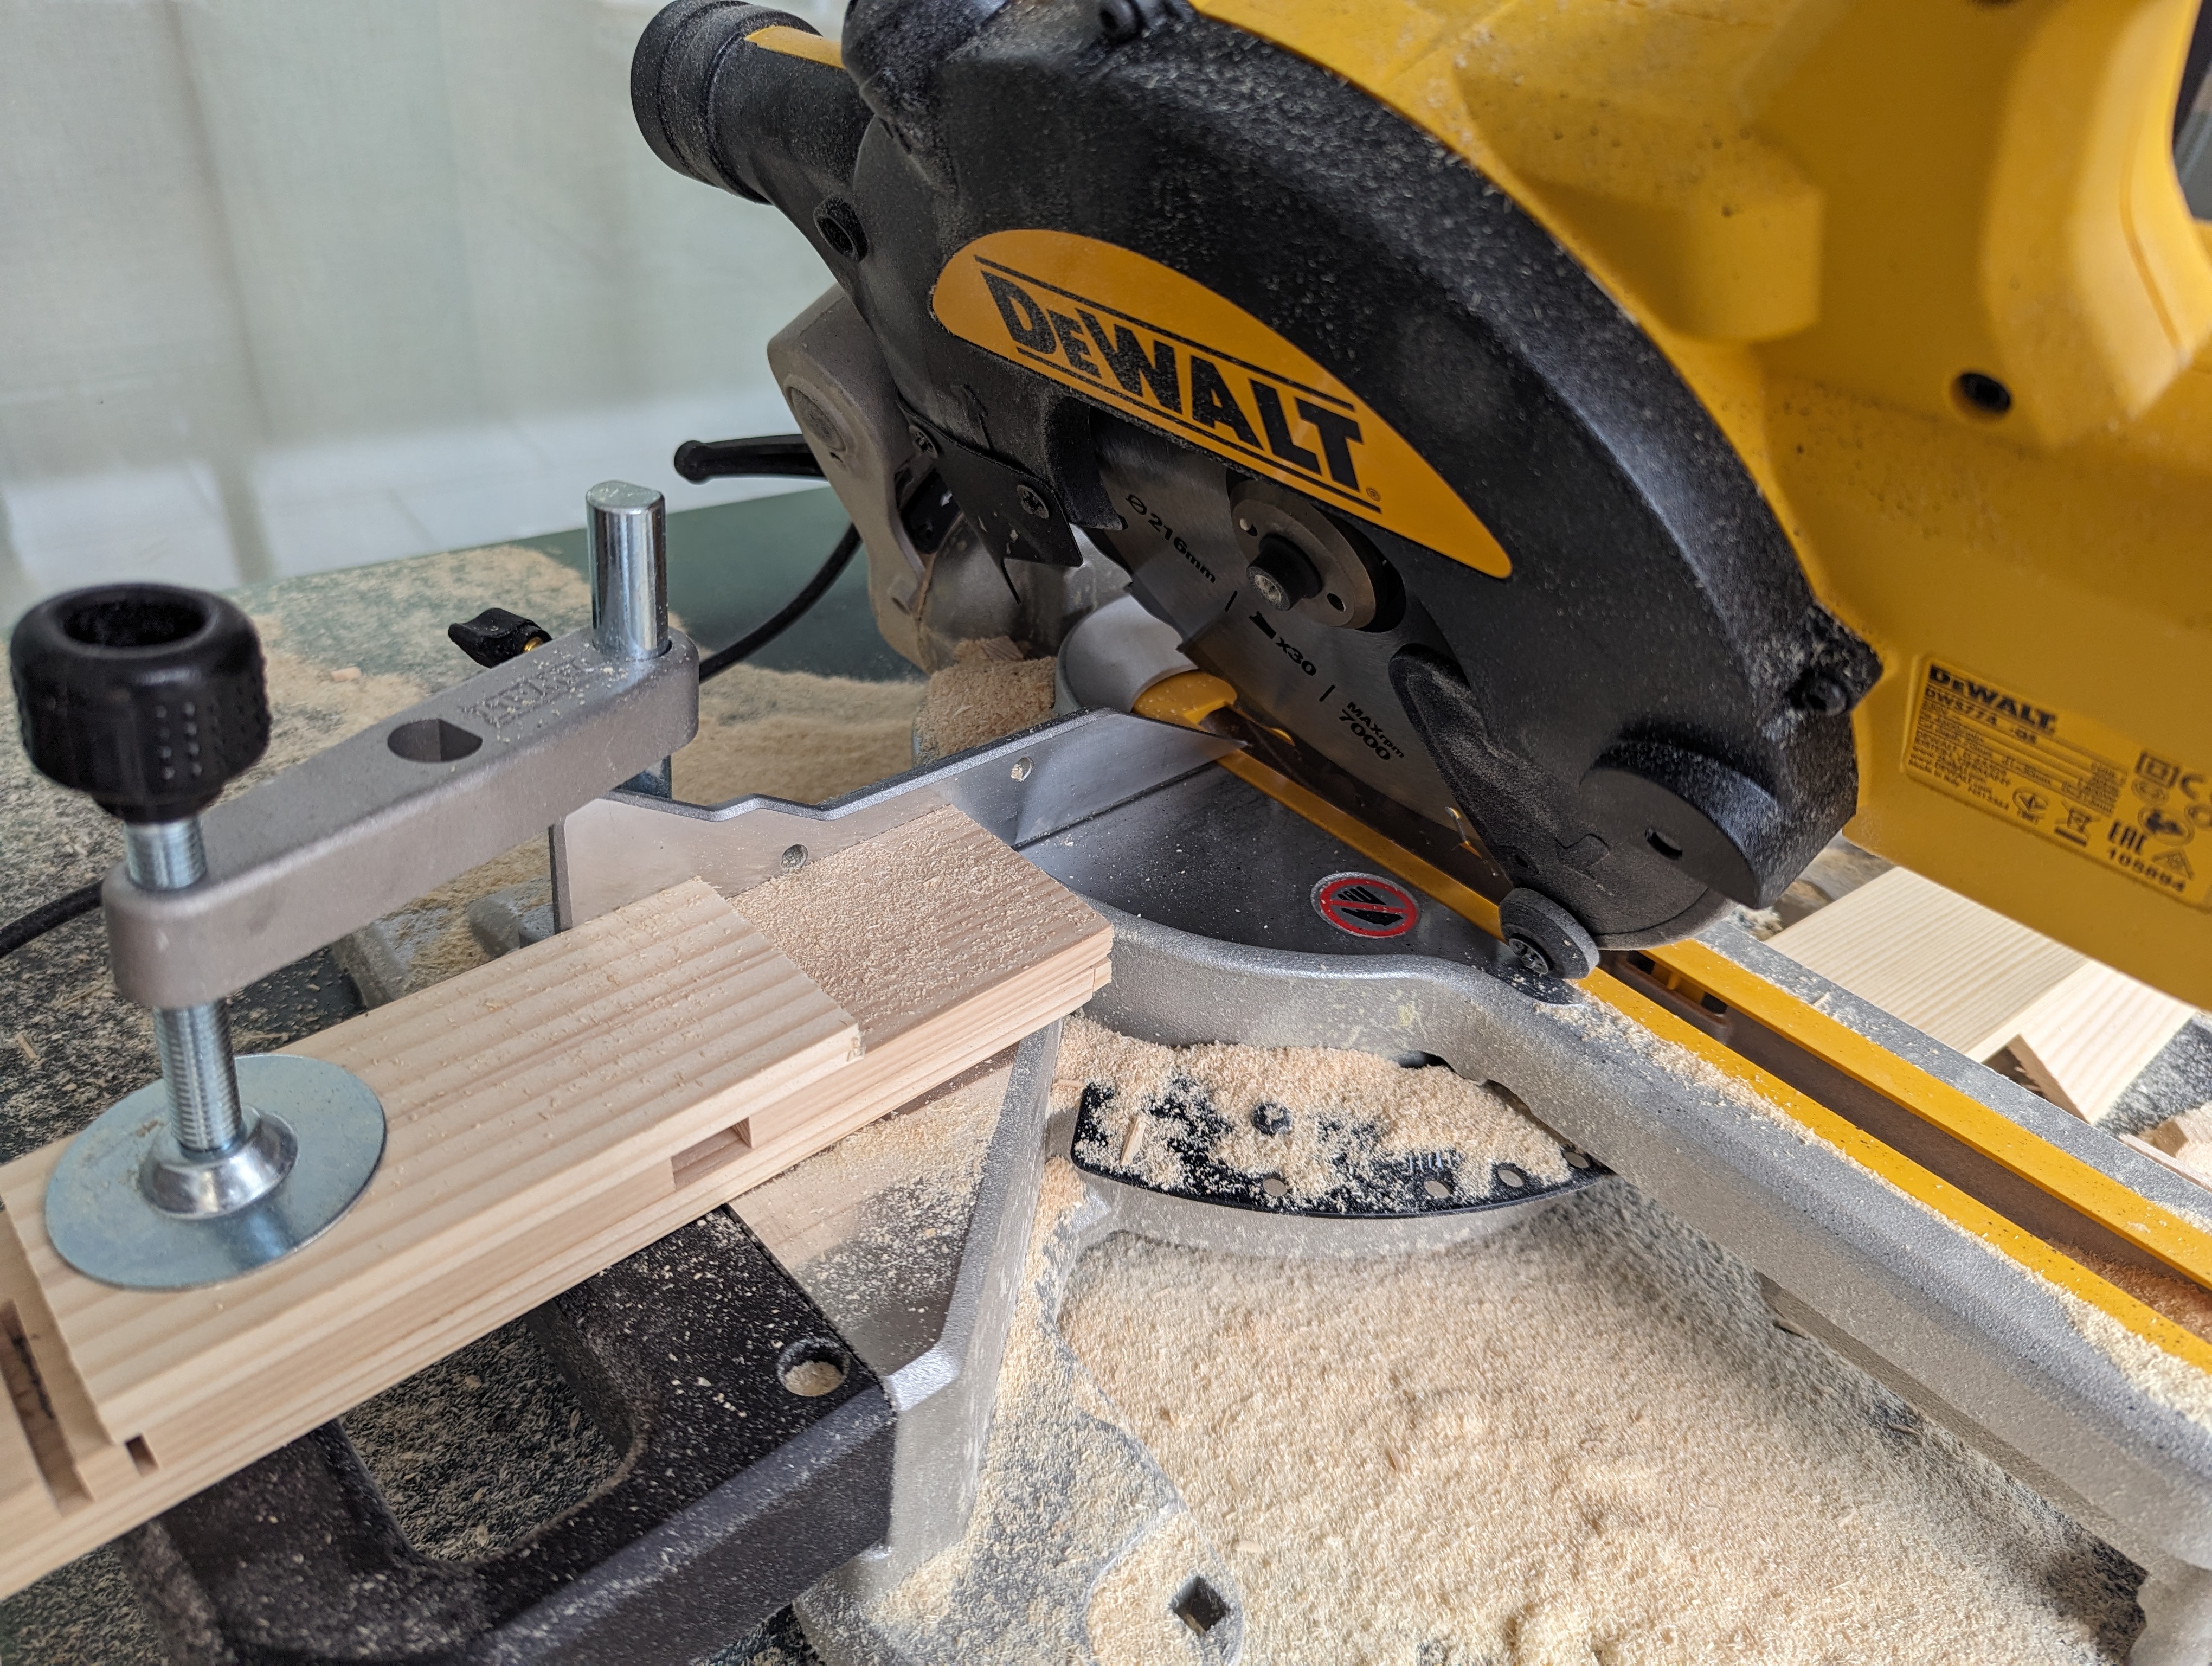
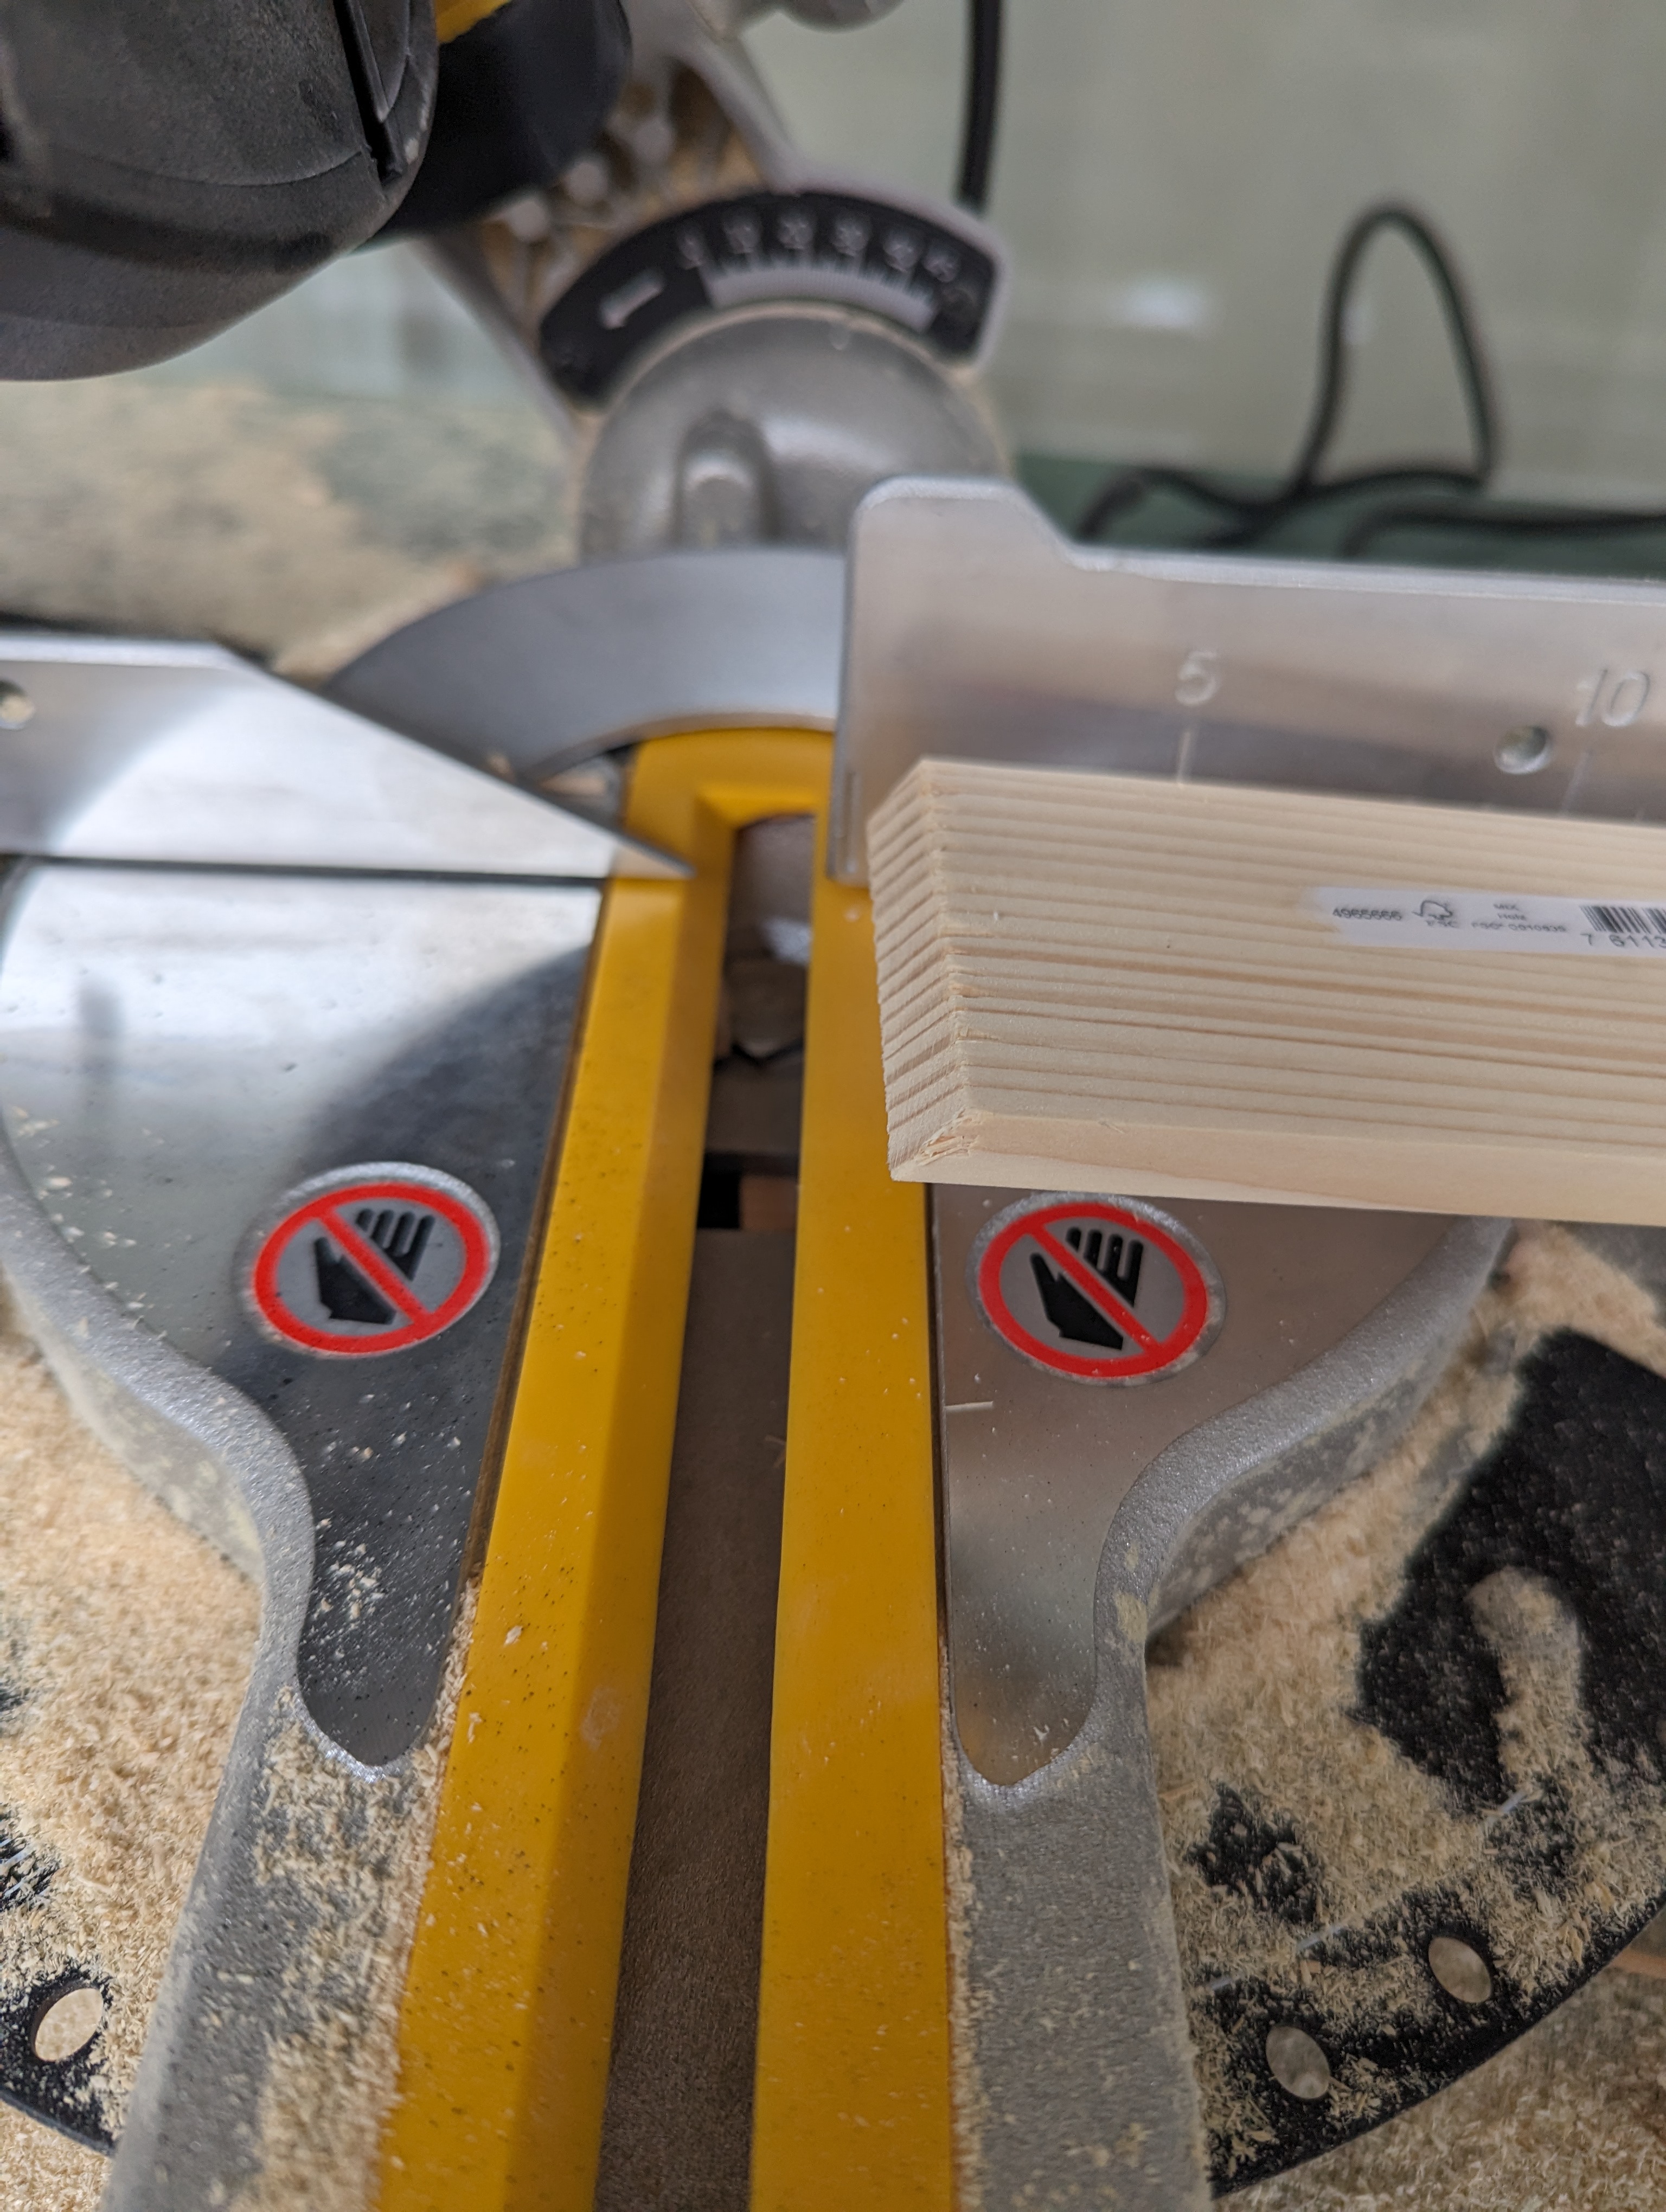
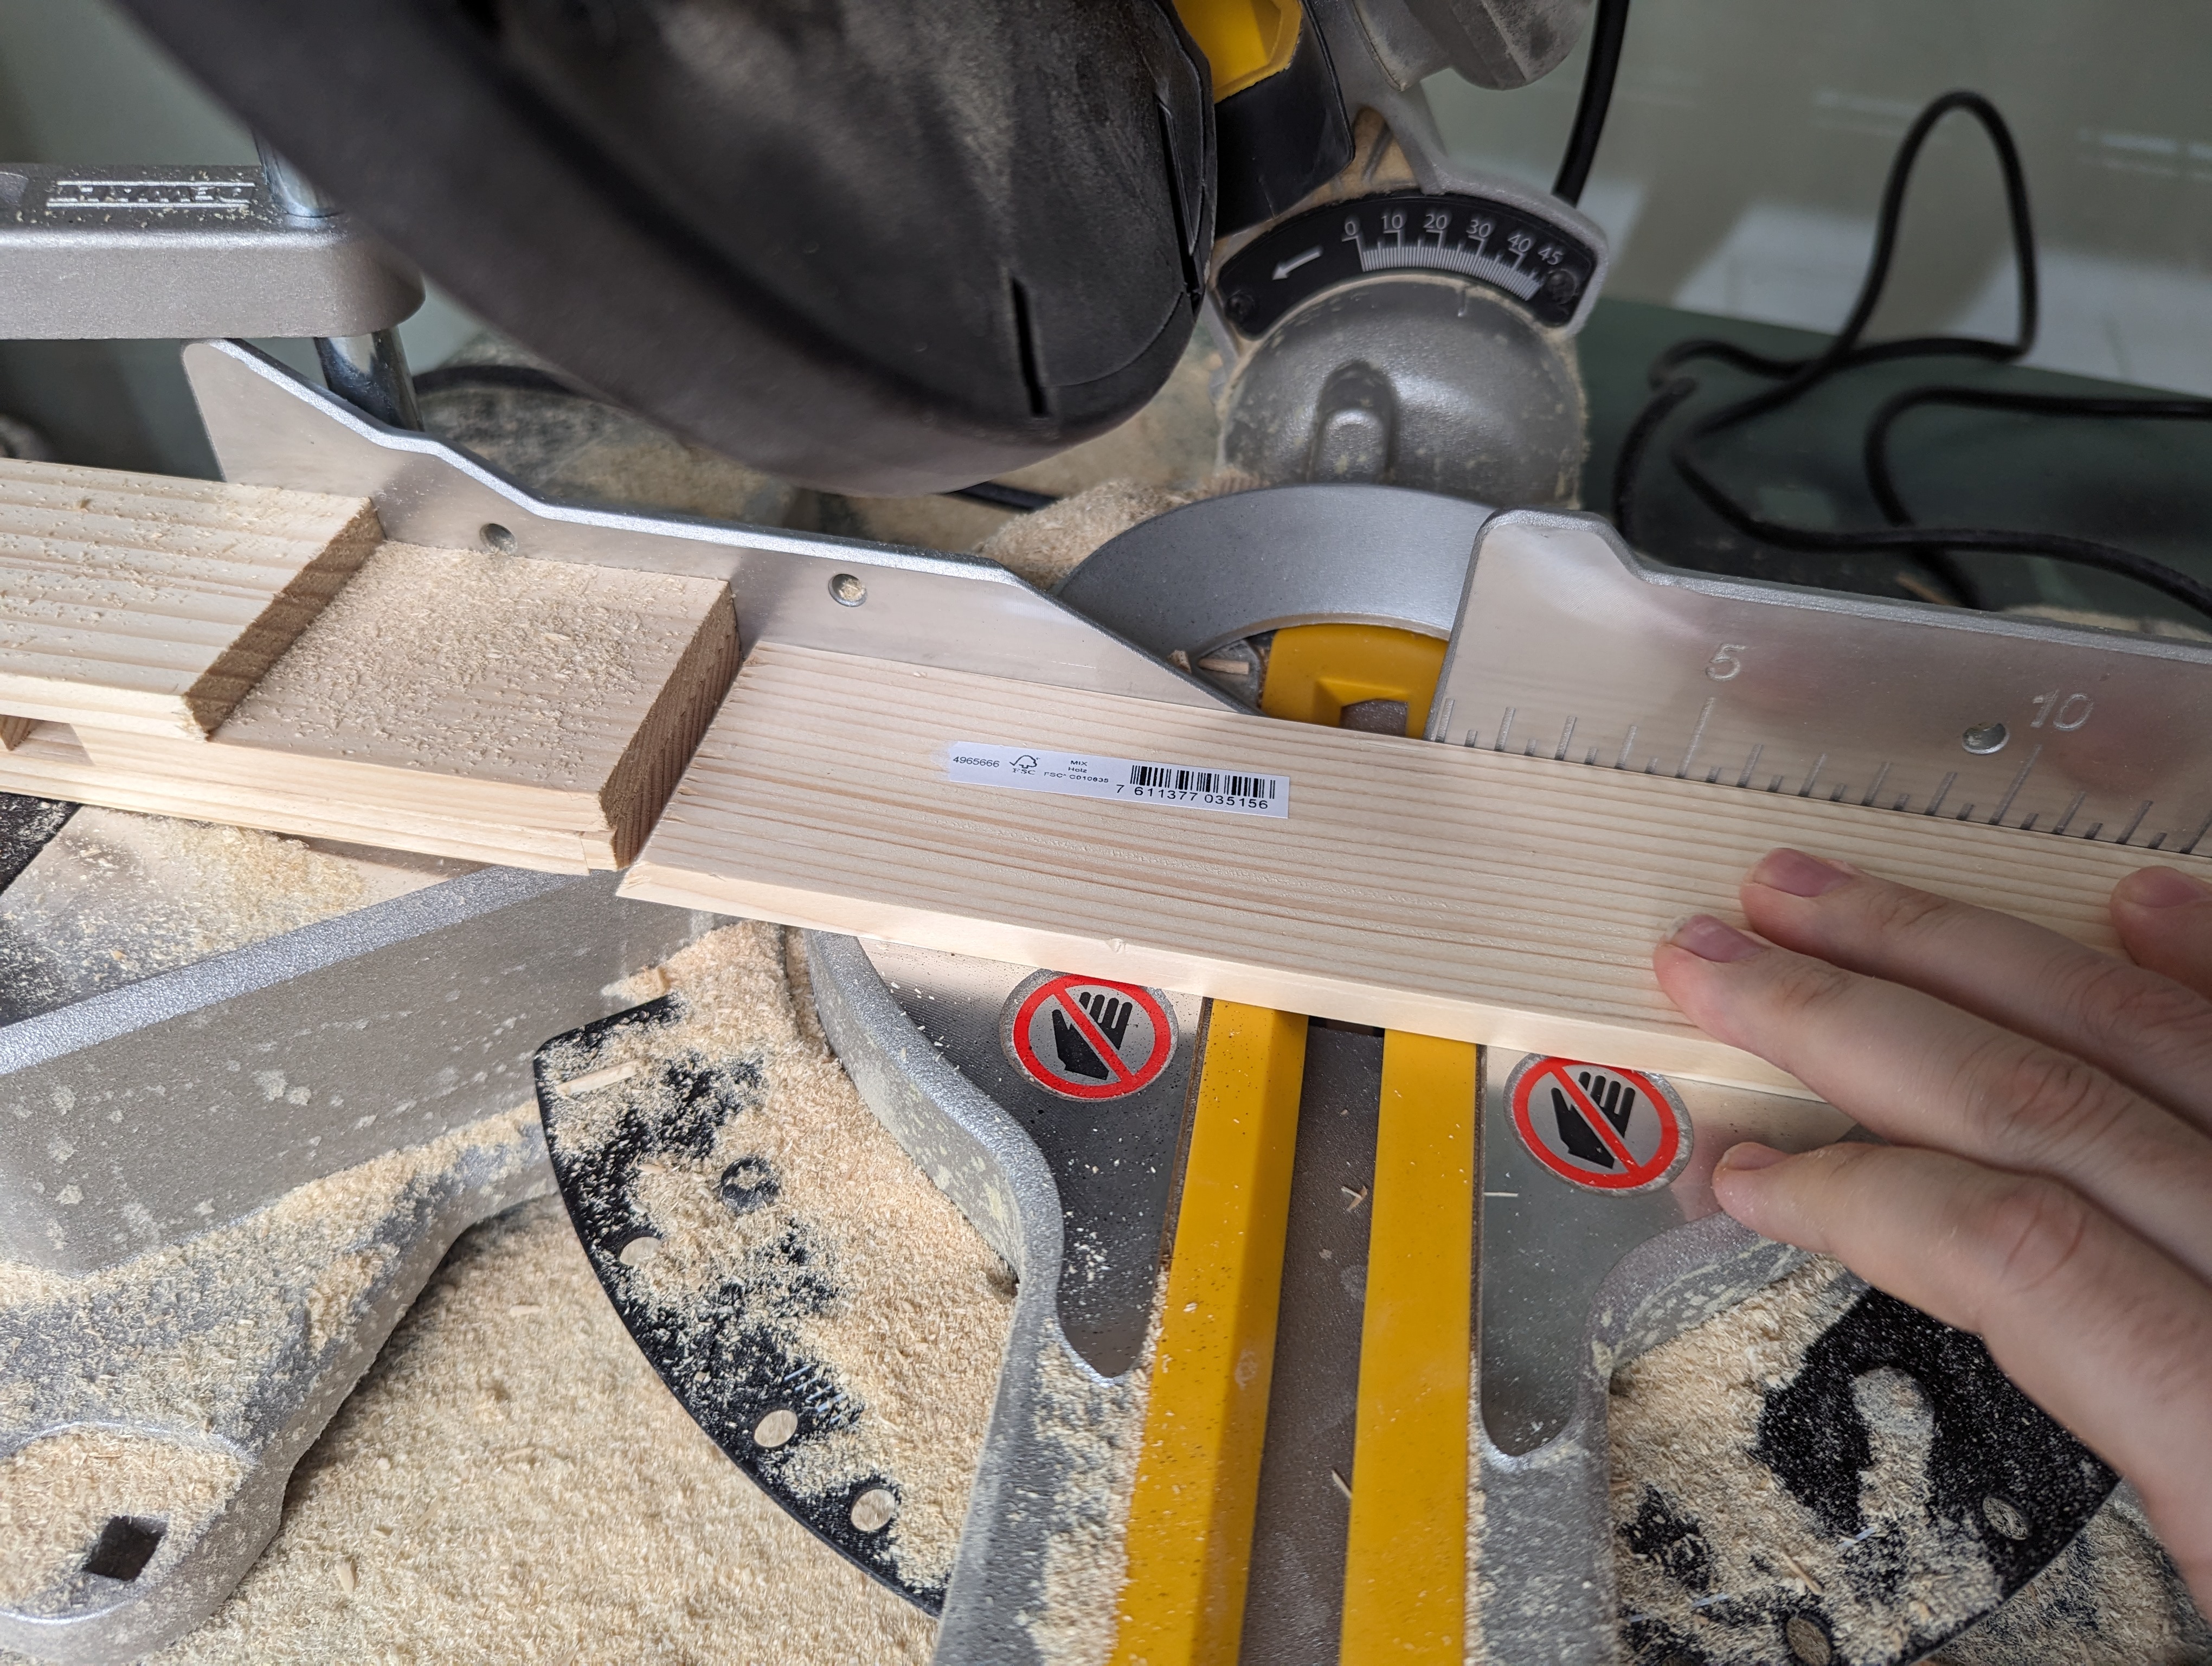
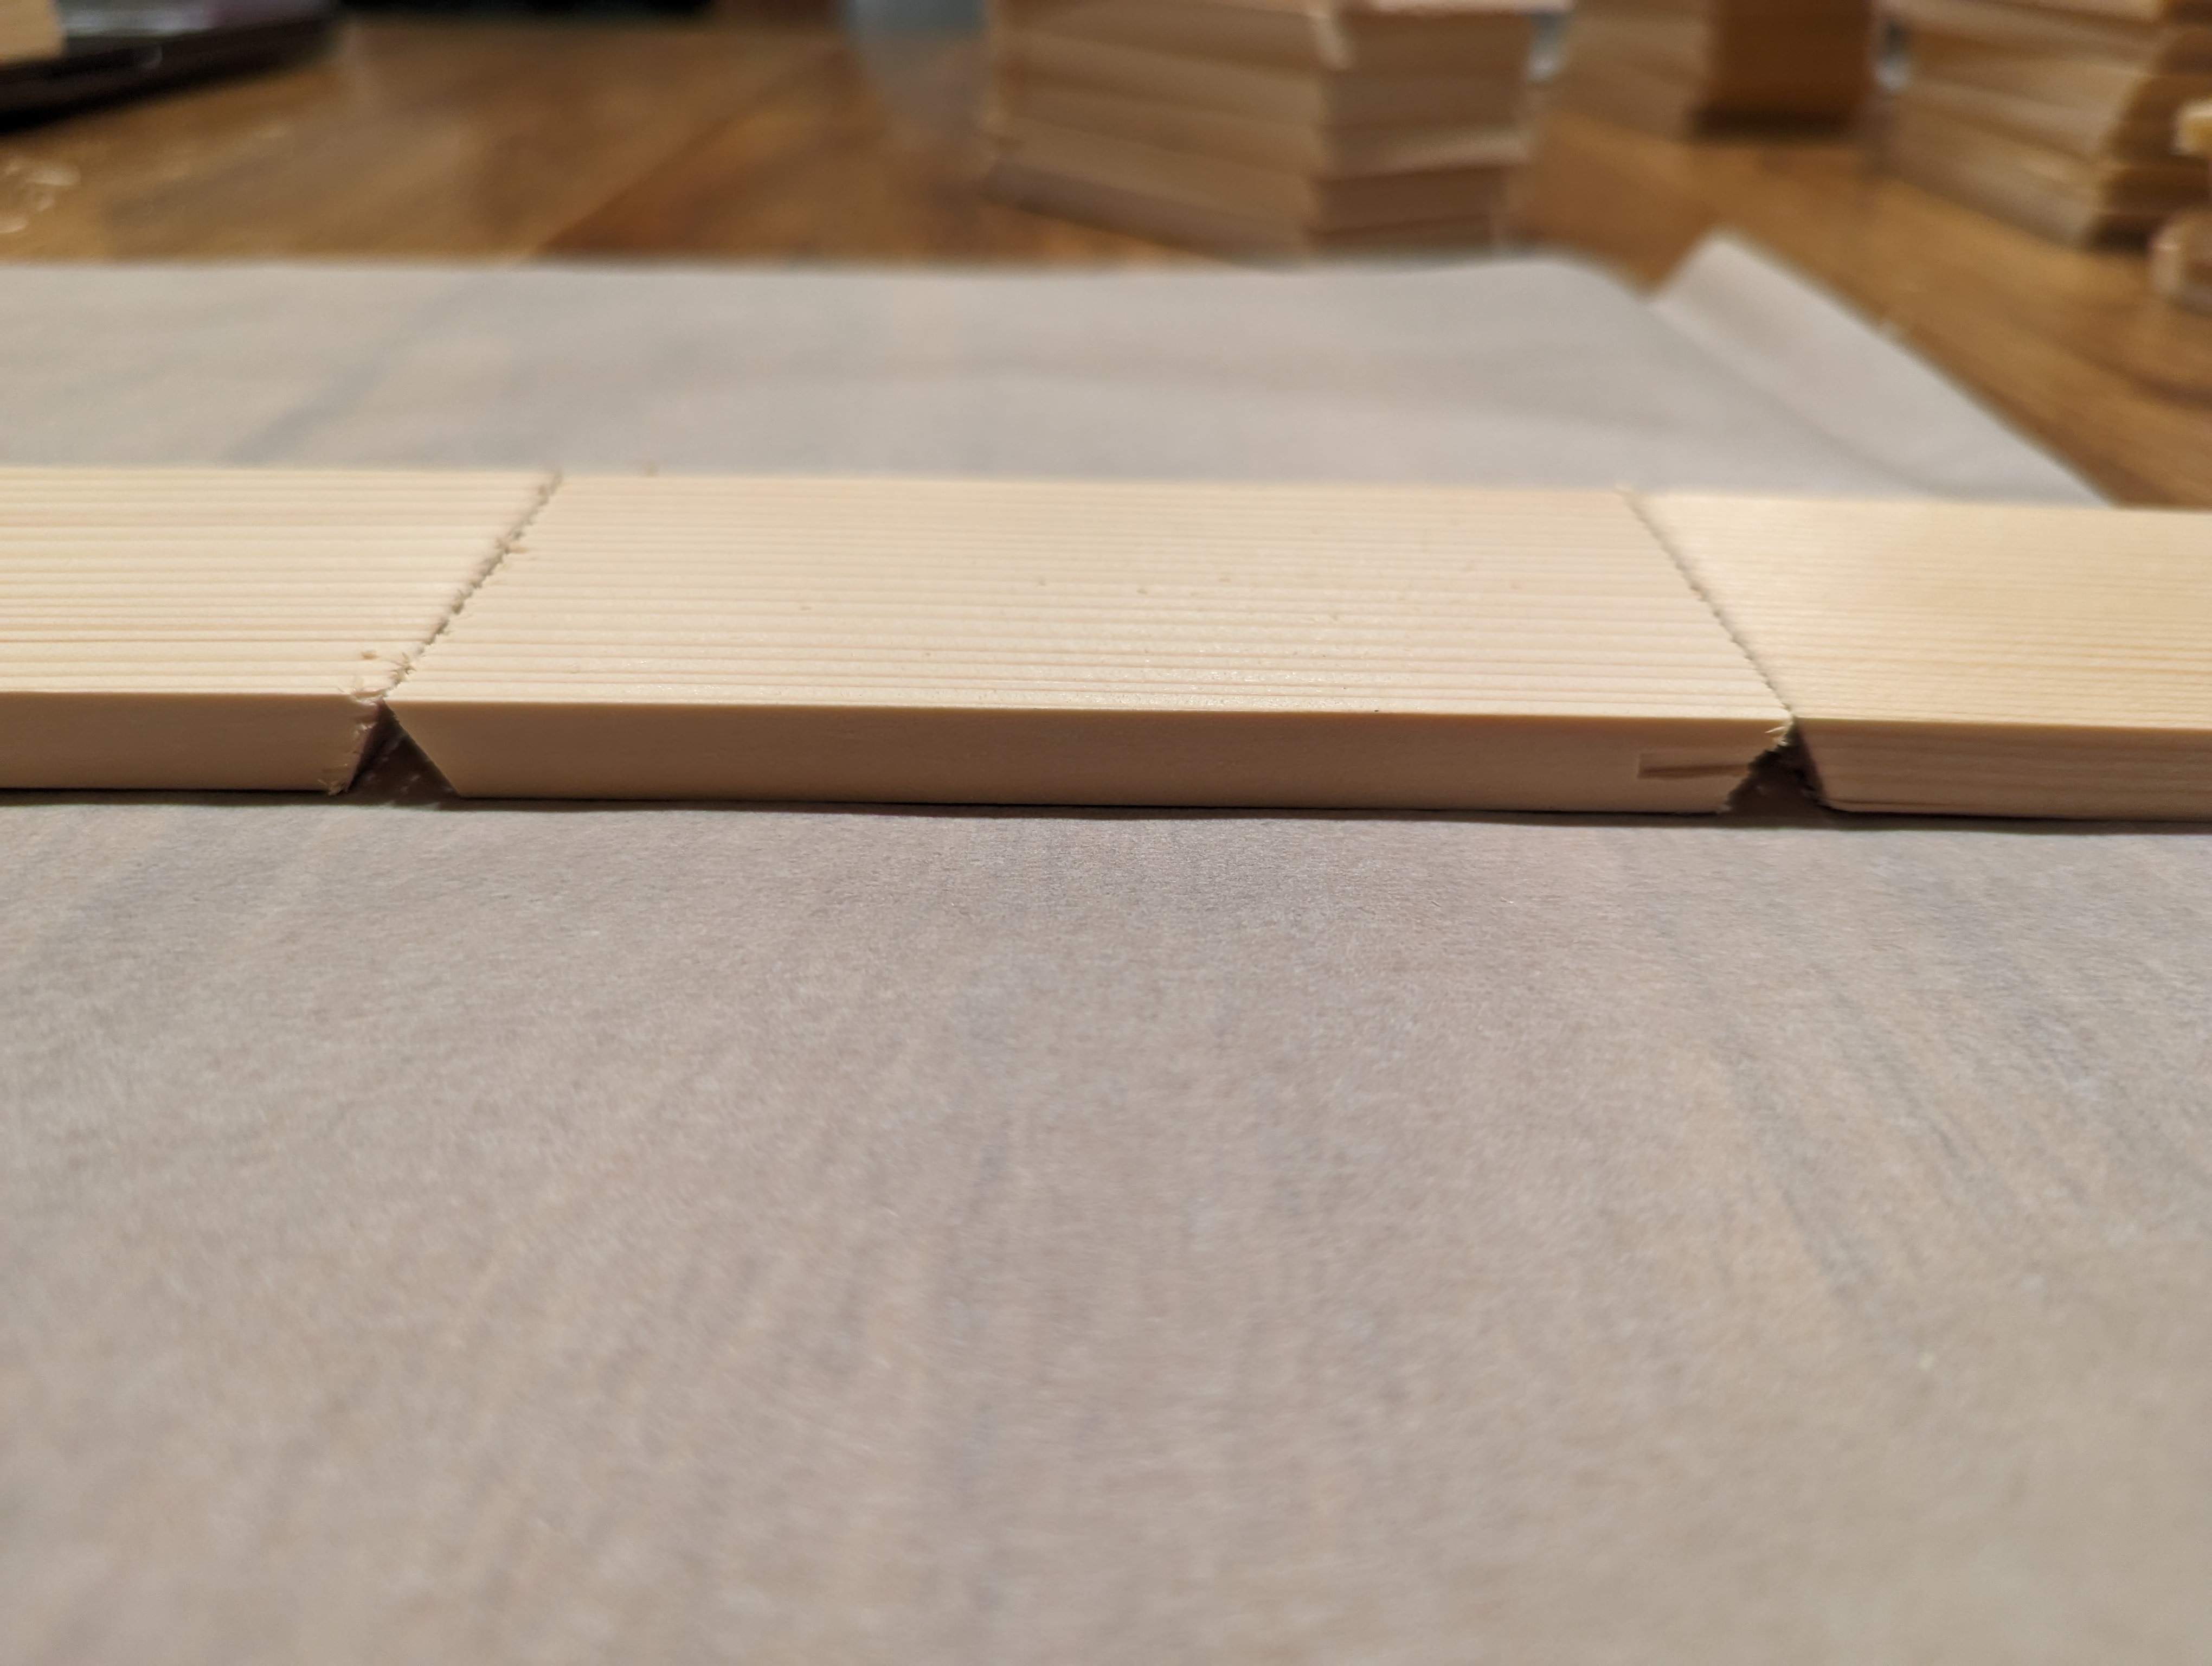
Step 2: Cutting the Wood
Using the miter saw set to a 30-degree angle, cut your wooden planks into six equal lengths for each hexagon. Ensure precision for the angles and length to fit together seamlessly.
To make is easier when cutting, use a piece of wood fixed to the miter saw as reference length.
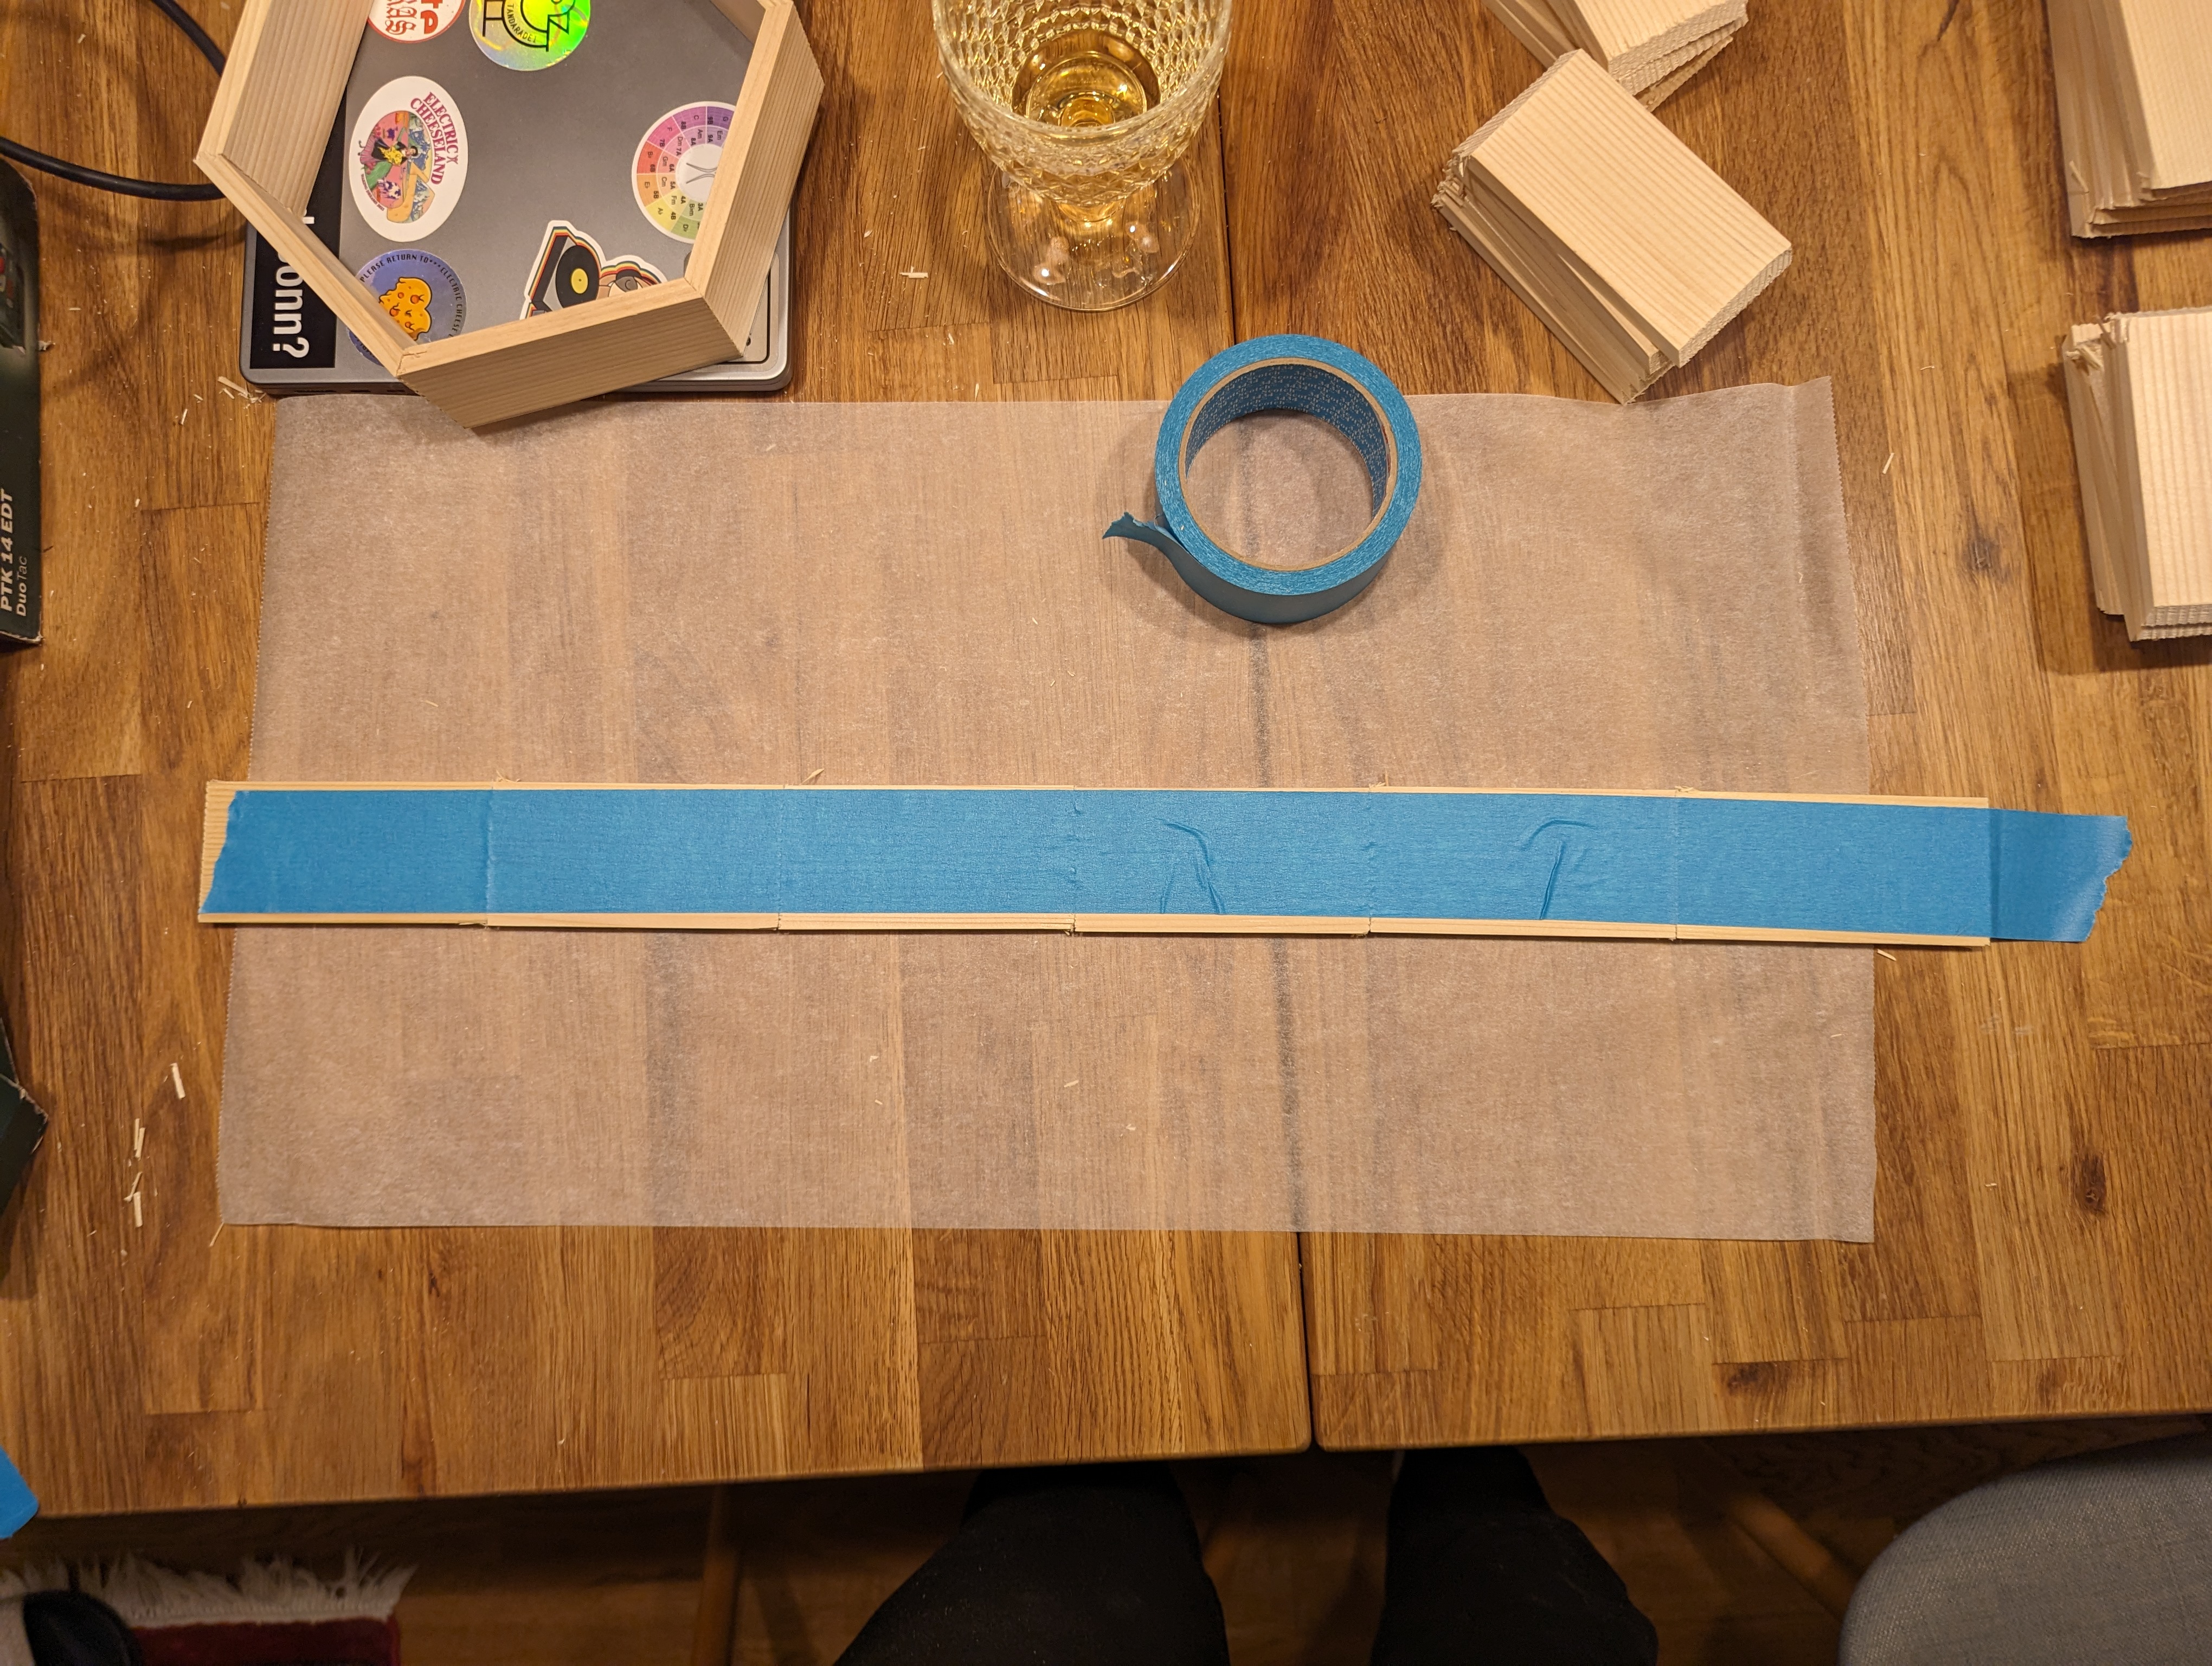
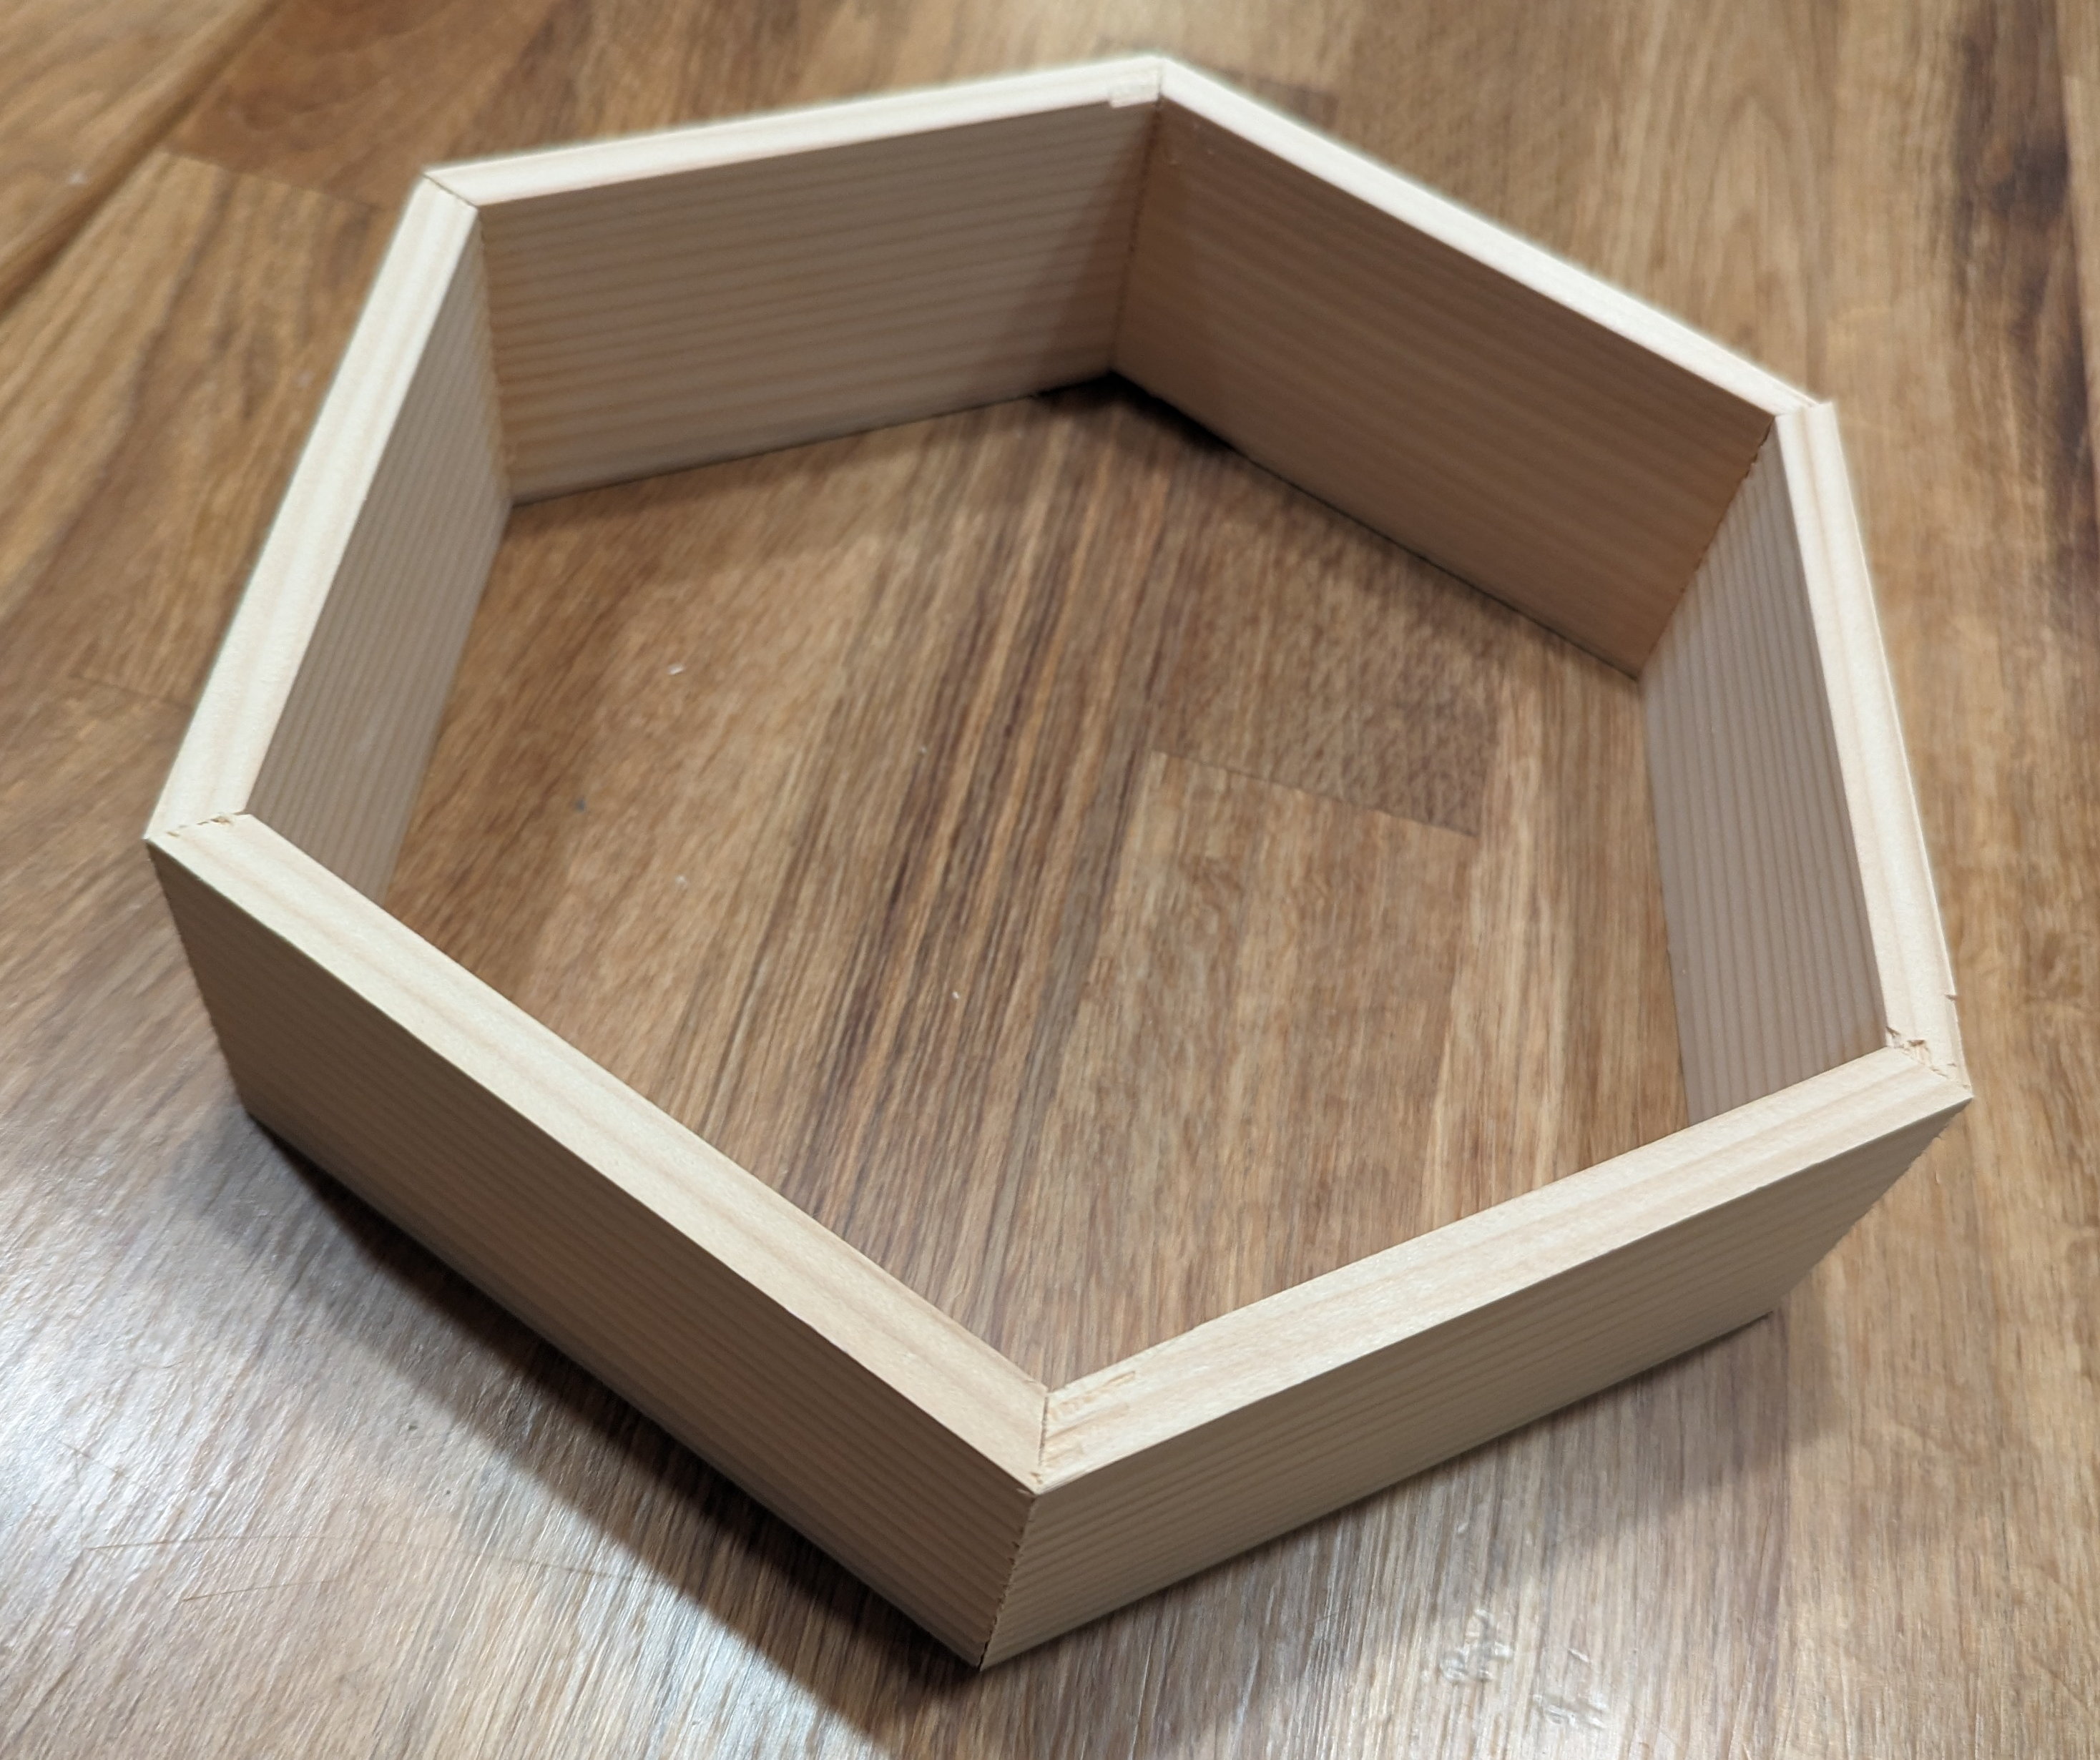
Step 3: Assembling the Hexagon Frames
Place the pieces with the shorter side facing down next to each other. Use something like painters pasking tape to tape them together. Leave some of the tape hanging out at the end to hold the last part of the hexagon together later.
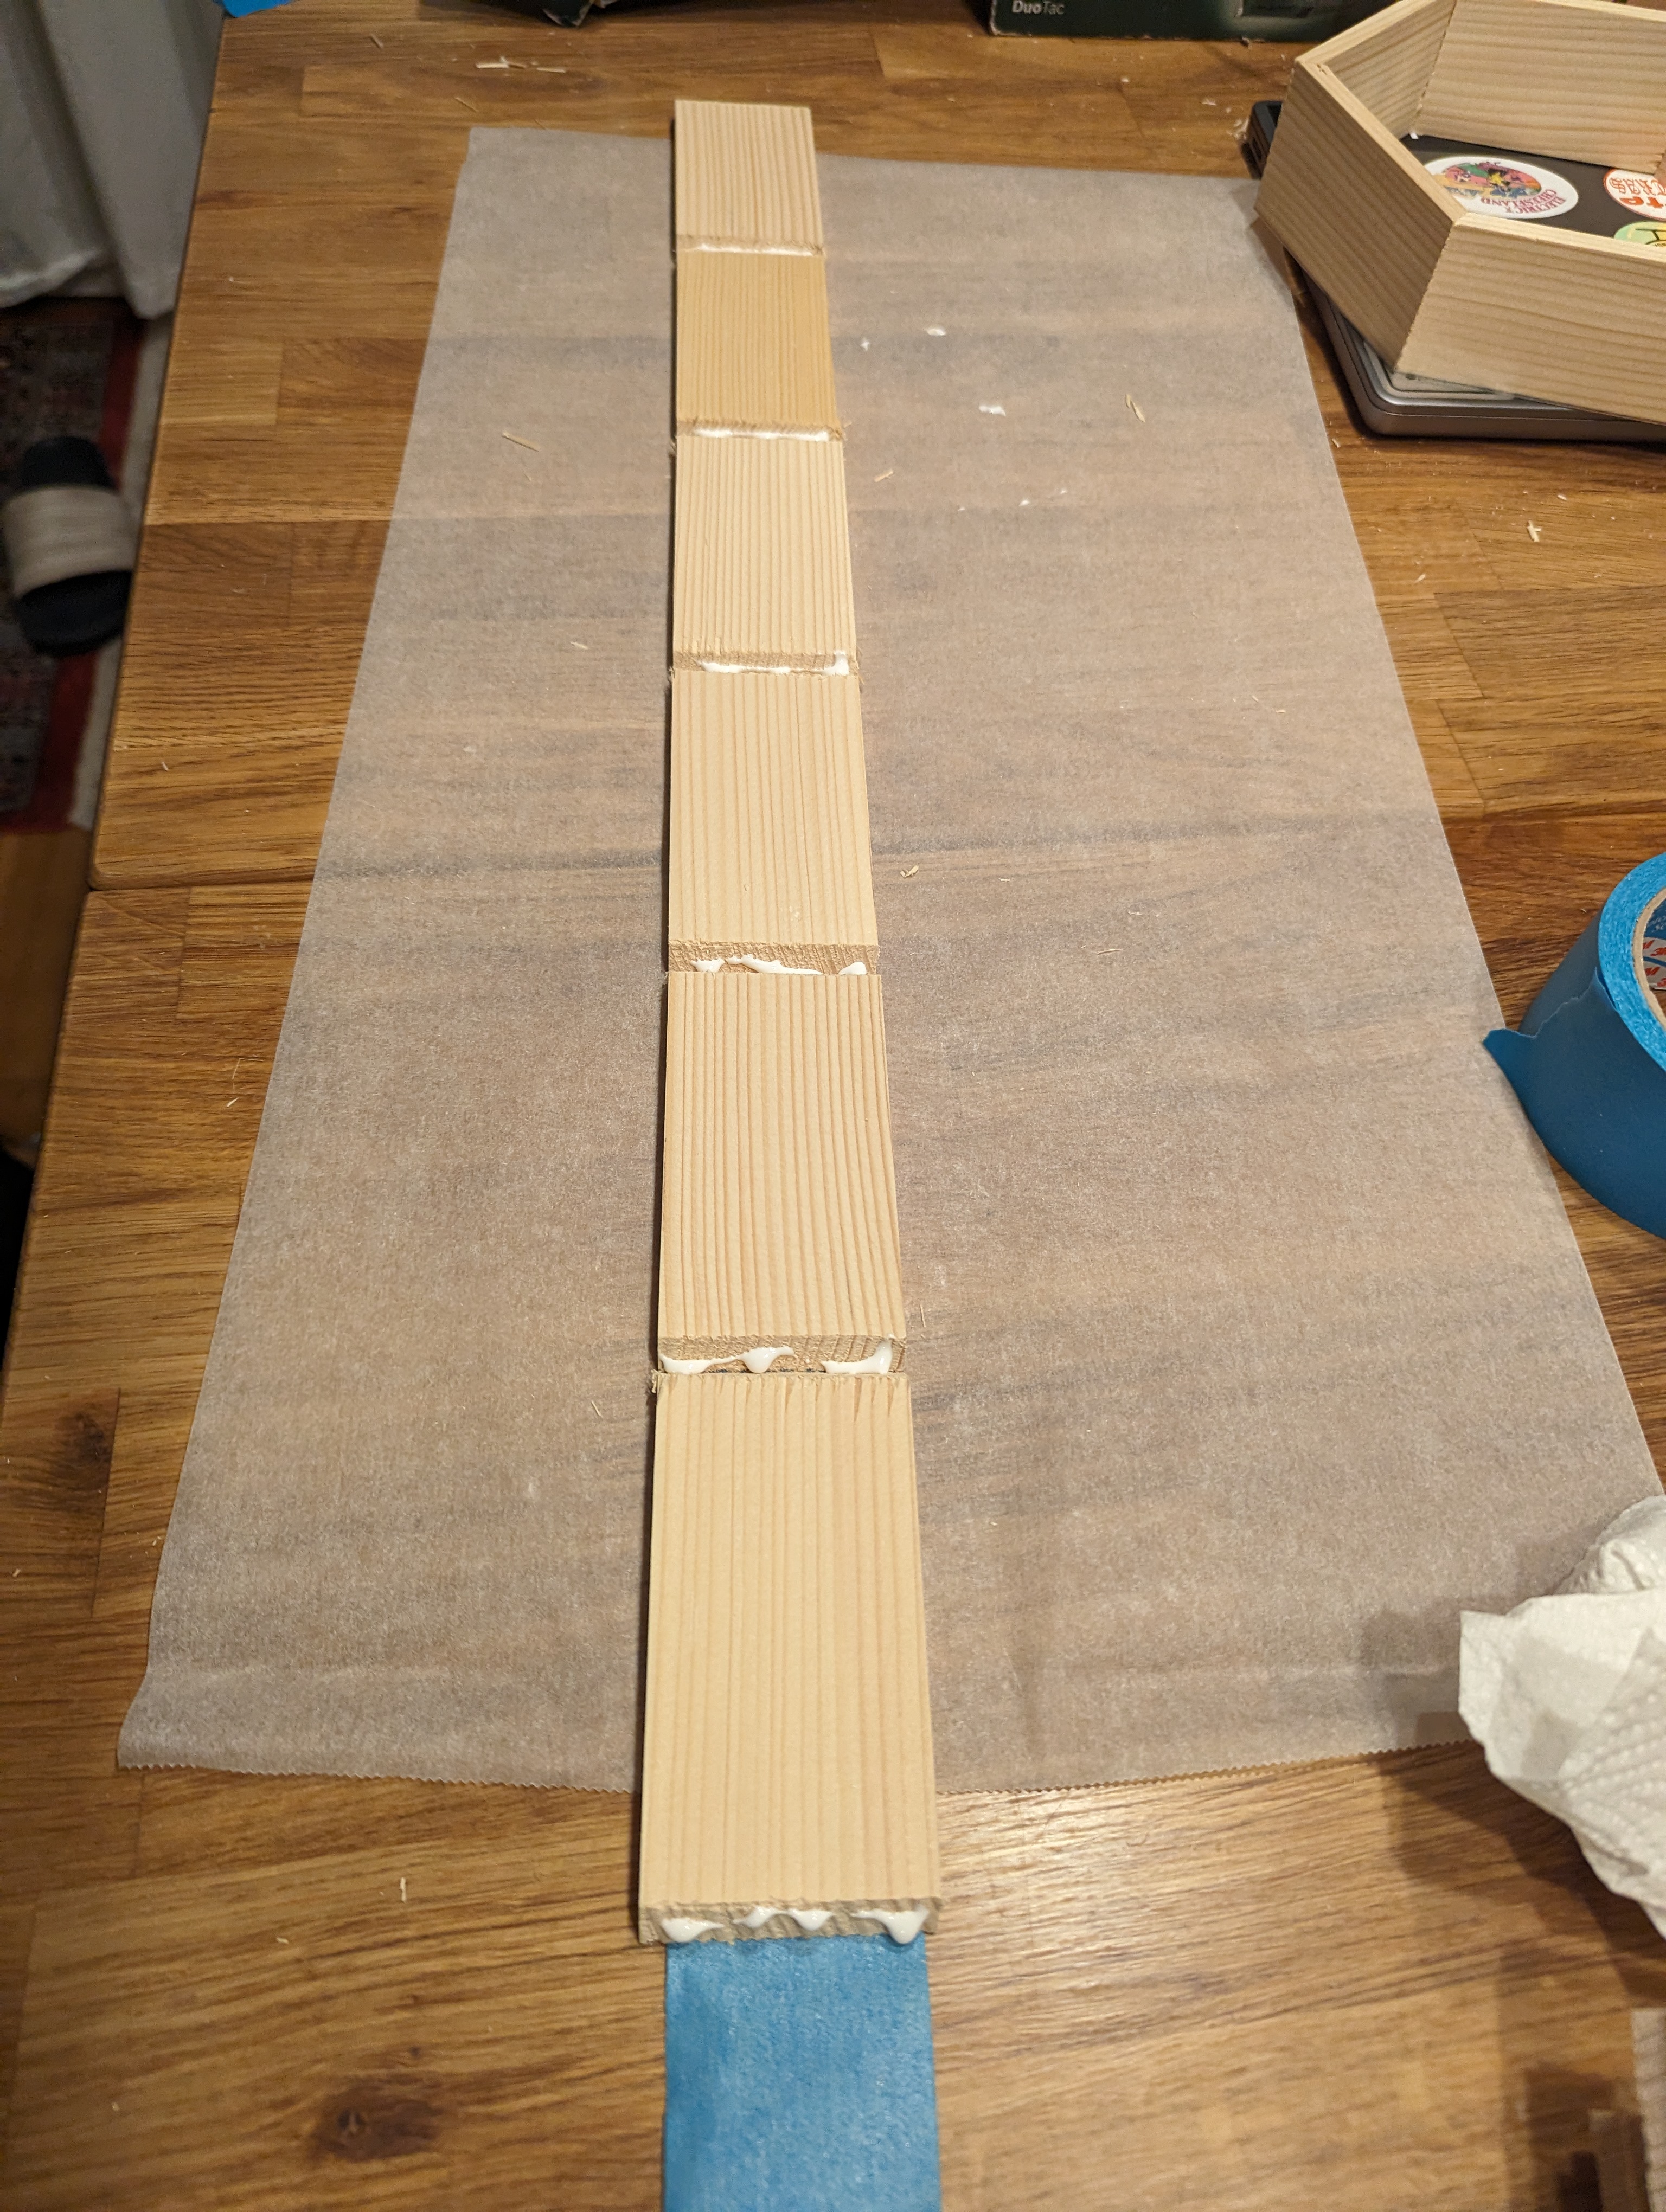
Put glue in each of the connections as well as at the end.
Fold the hexagon together and fix with the overhanging duct tape. Then let the glue dry with the tape on.
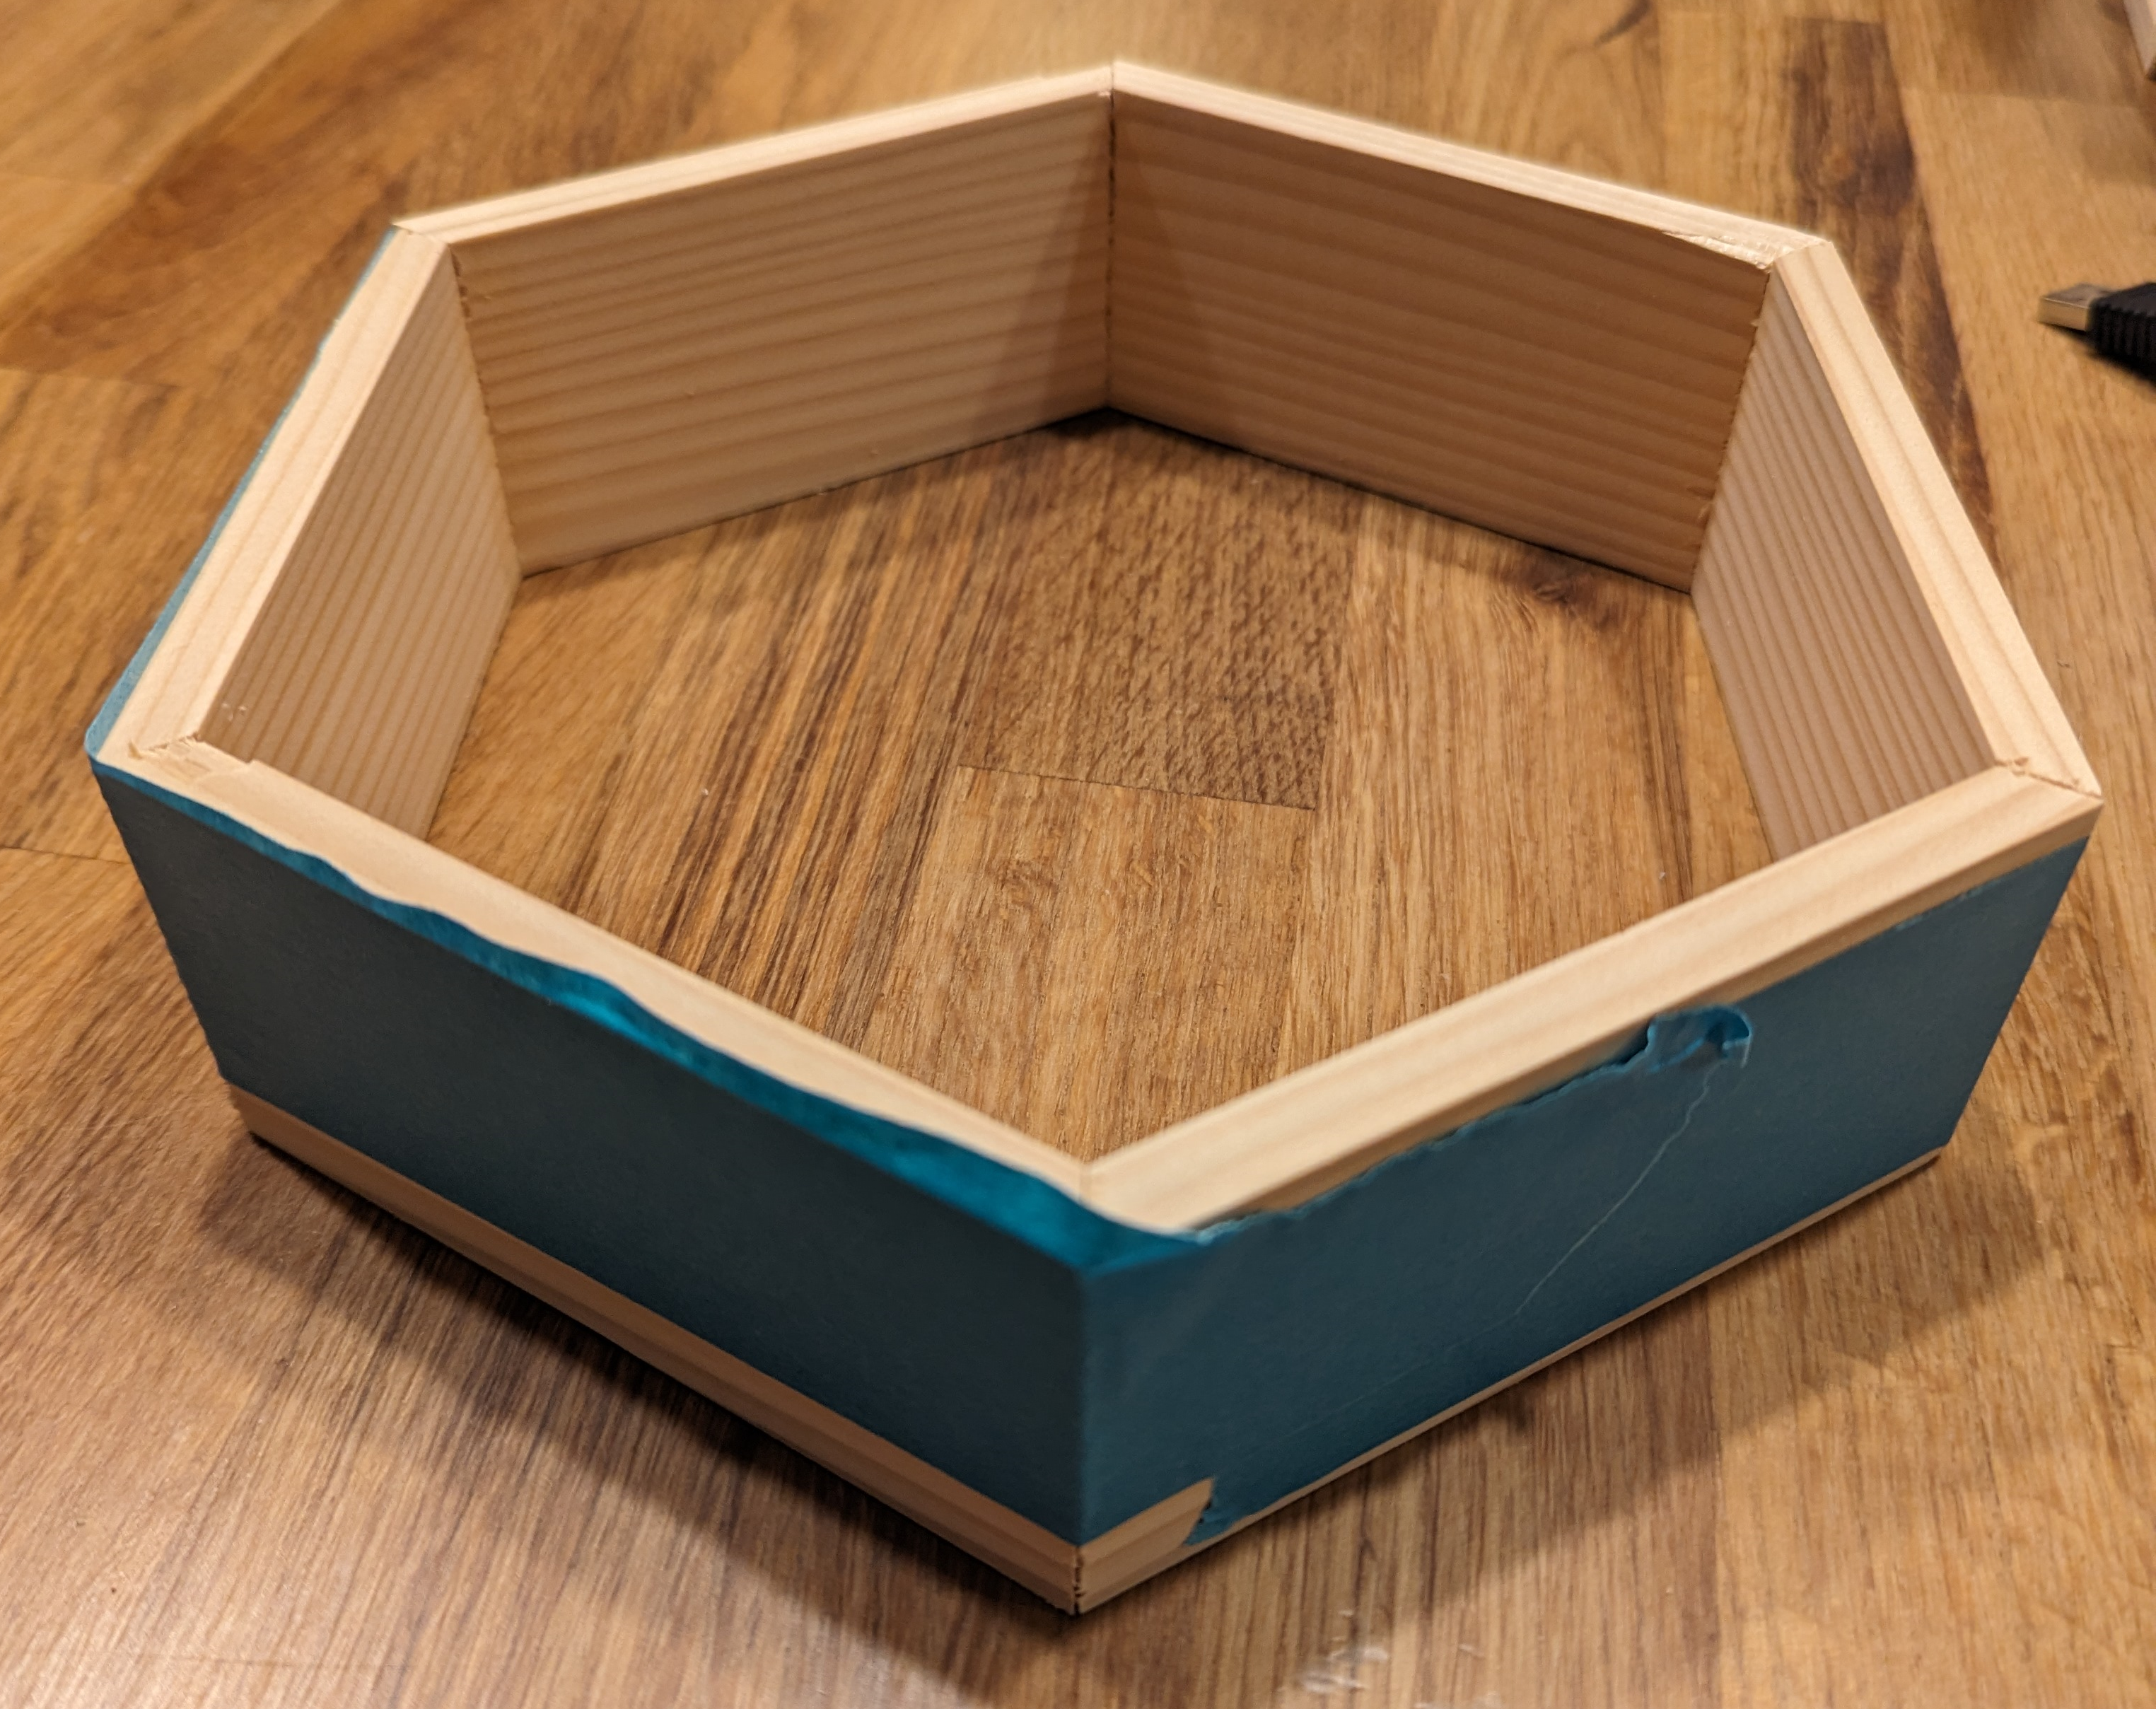
When the glue hardened, remove the tape.
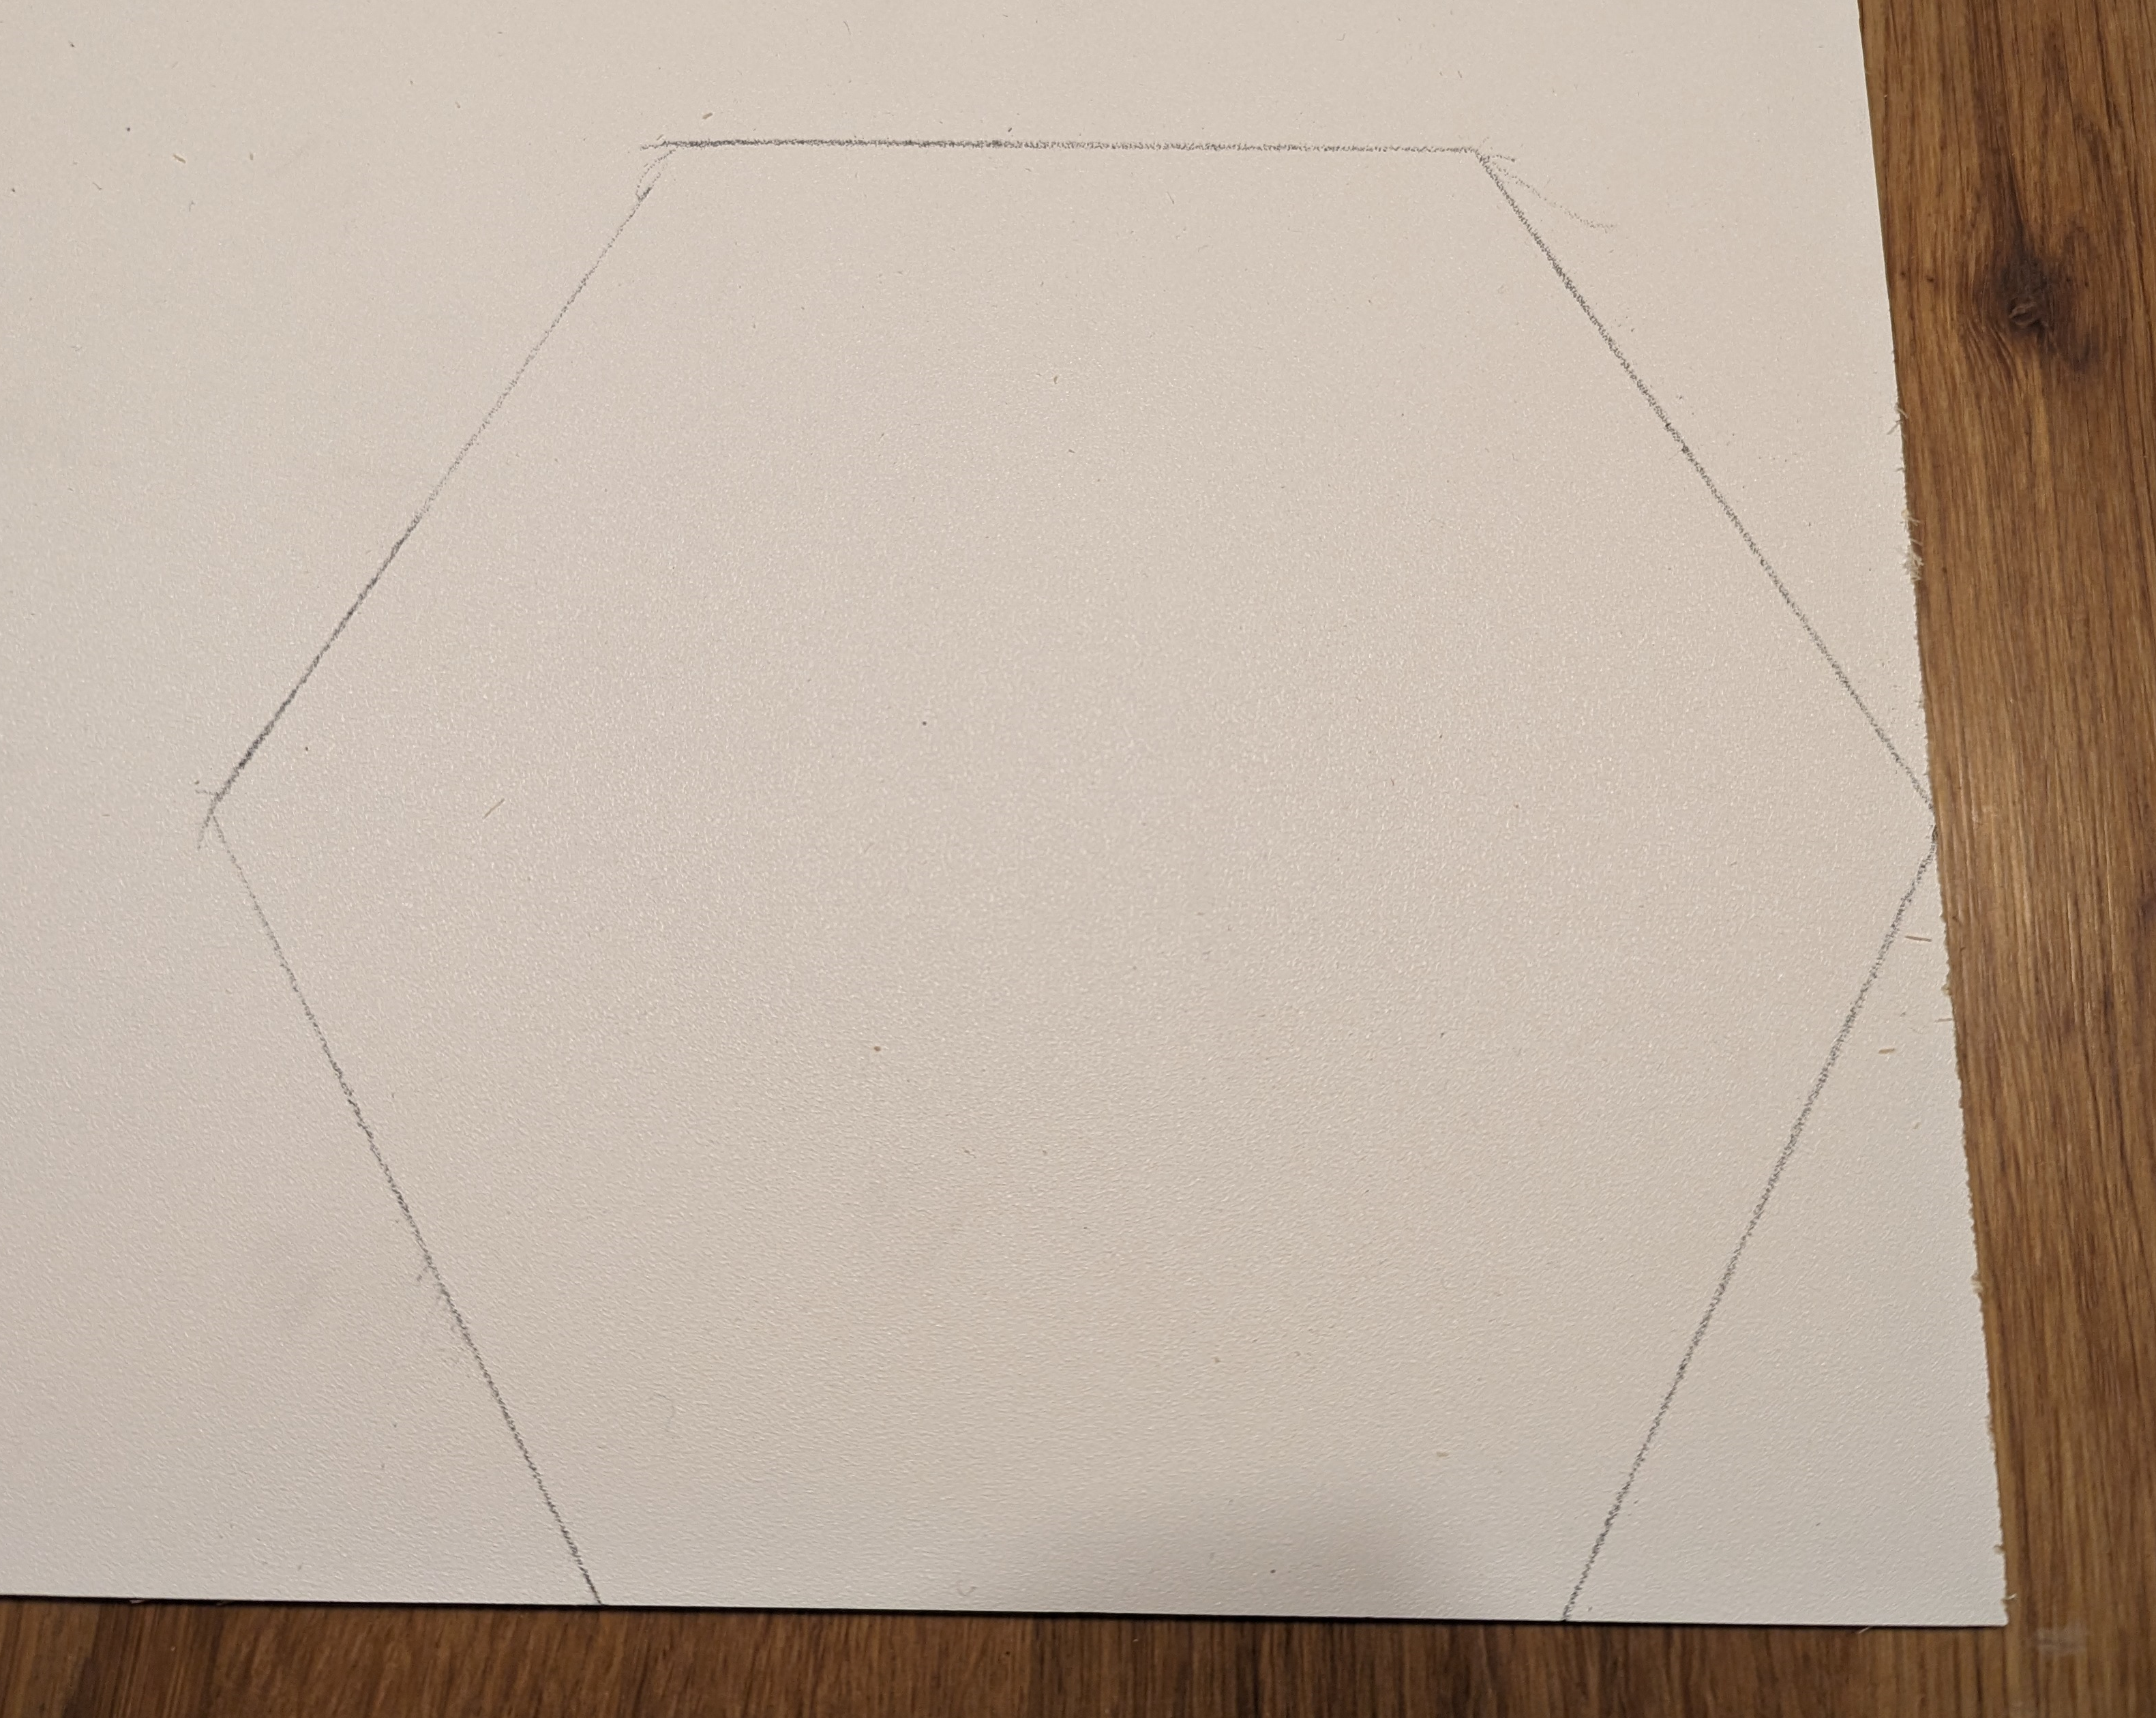
Step 4: Preparing the Backplate
Cut the backplate material to fit the size of each hexagon. For easy measuring, place a finished hexagon on the backplate and use it as template to draw.

Using a pencil, follow along the outer side of the hexagon.
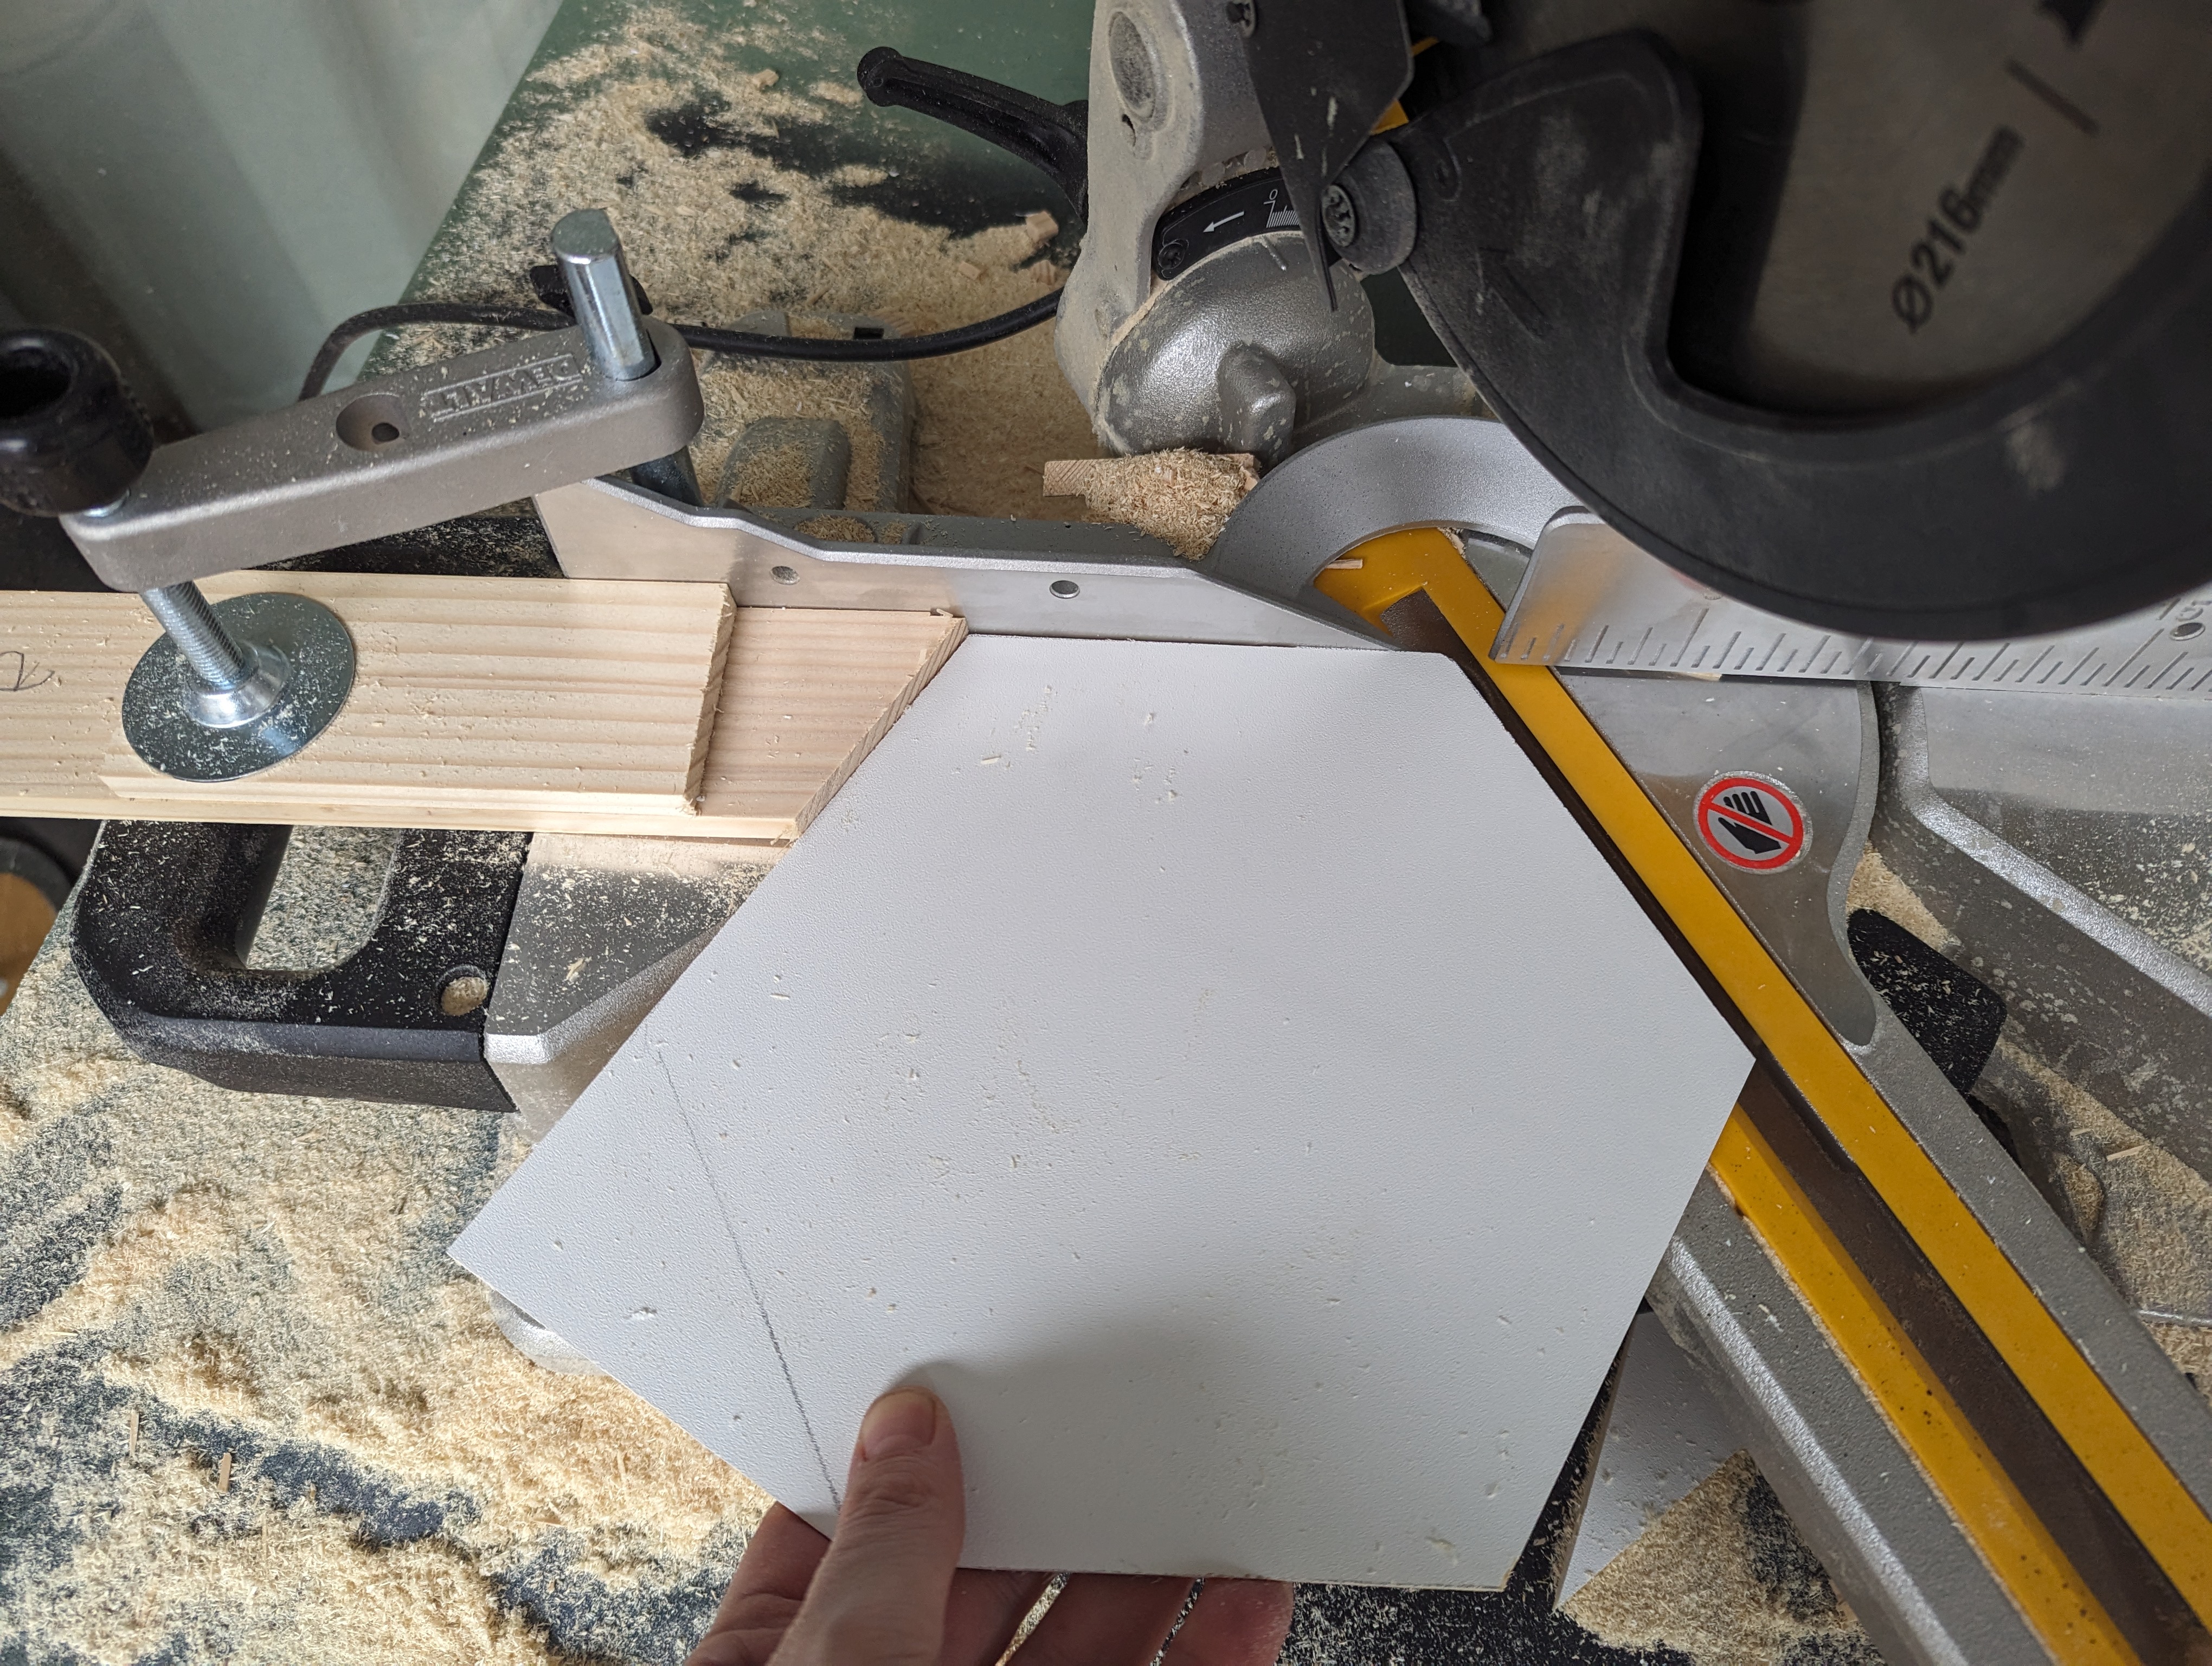
Cut the backplate. You can use another blocker on the miten saw to make the cutting process a lot easier.
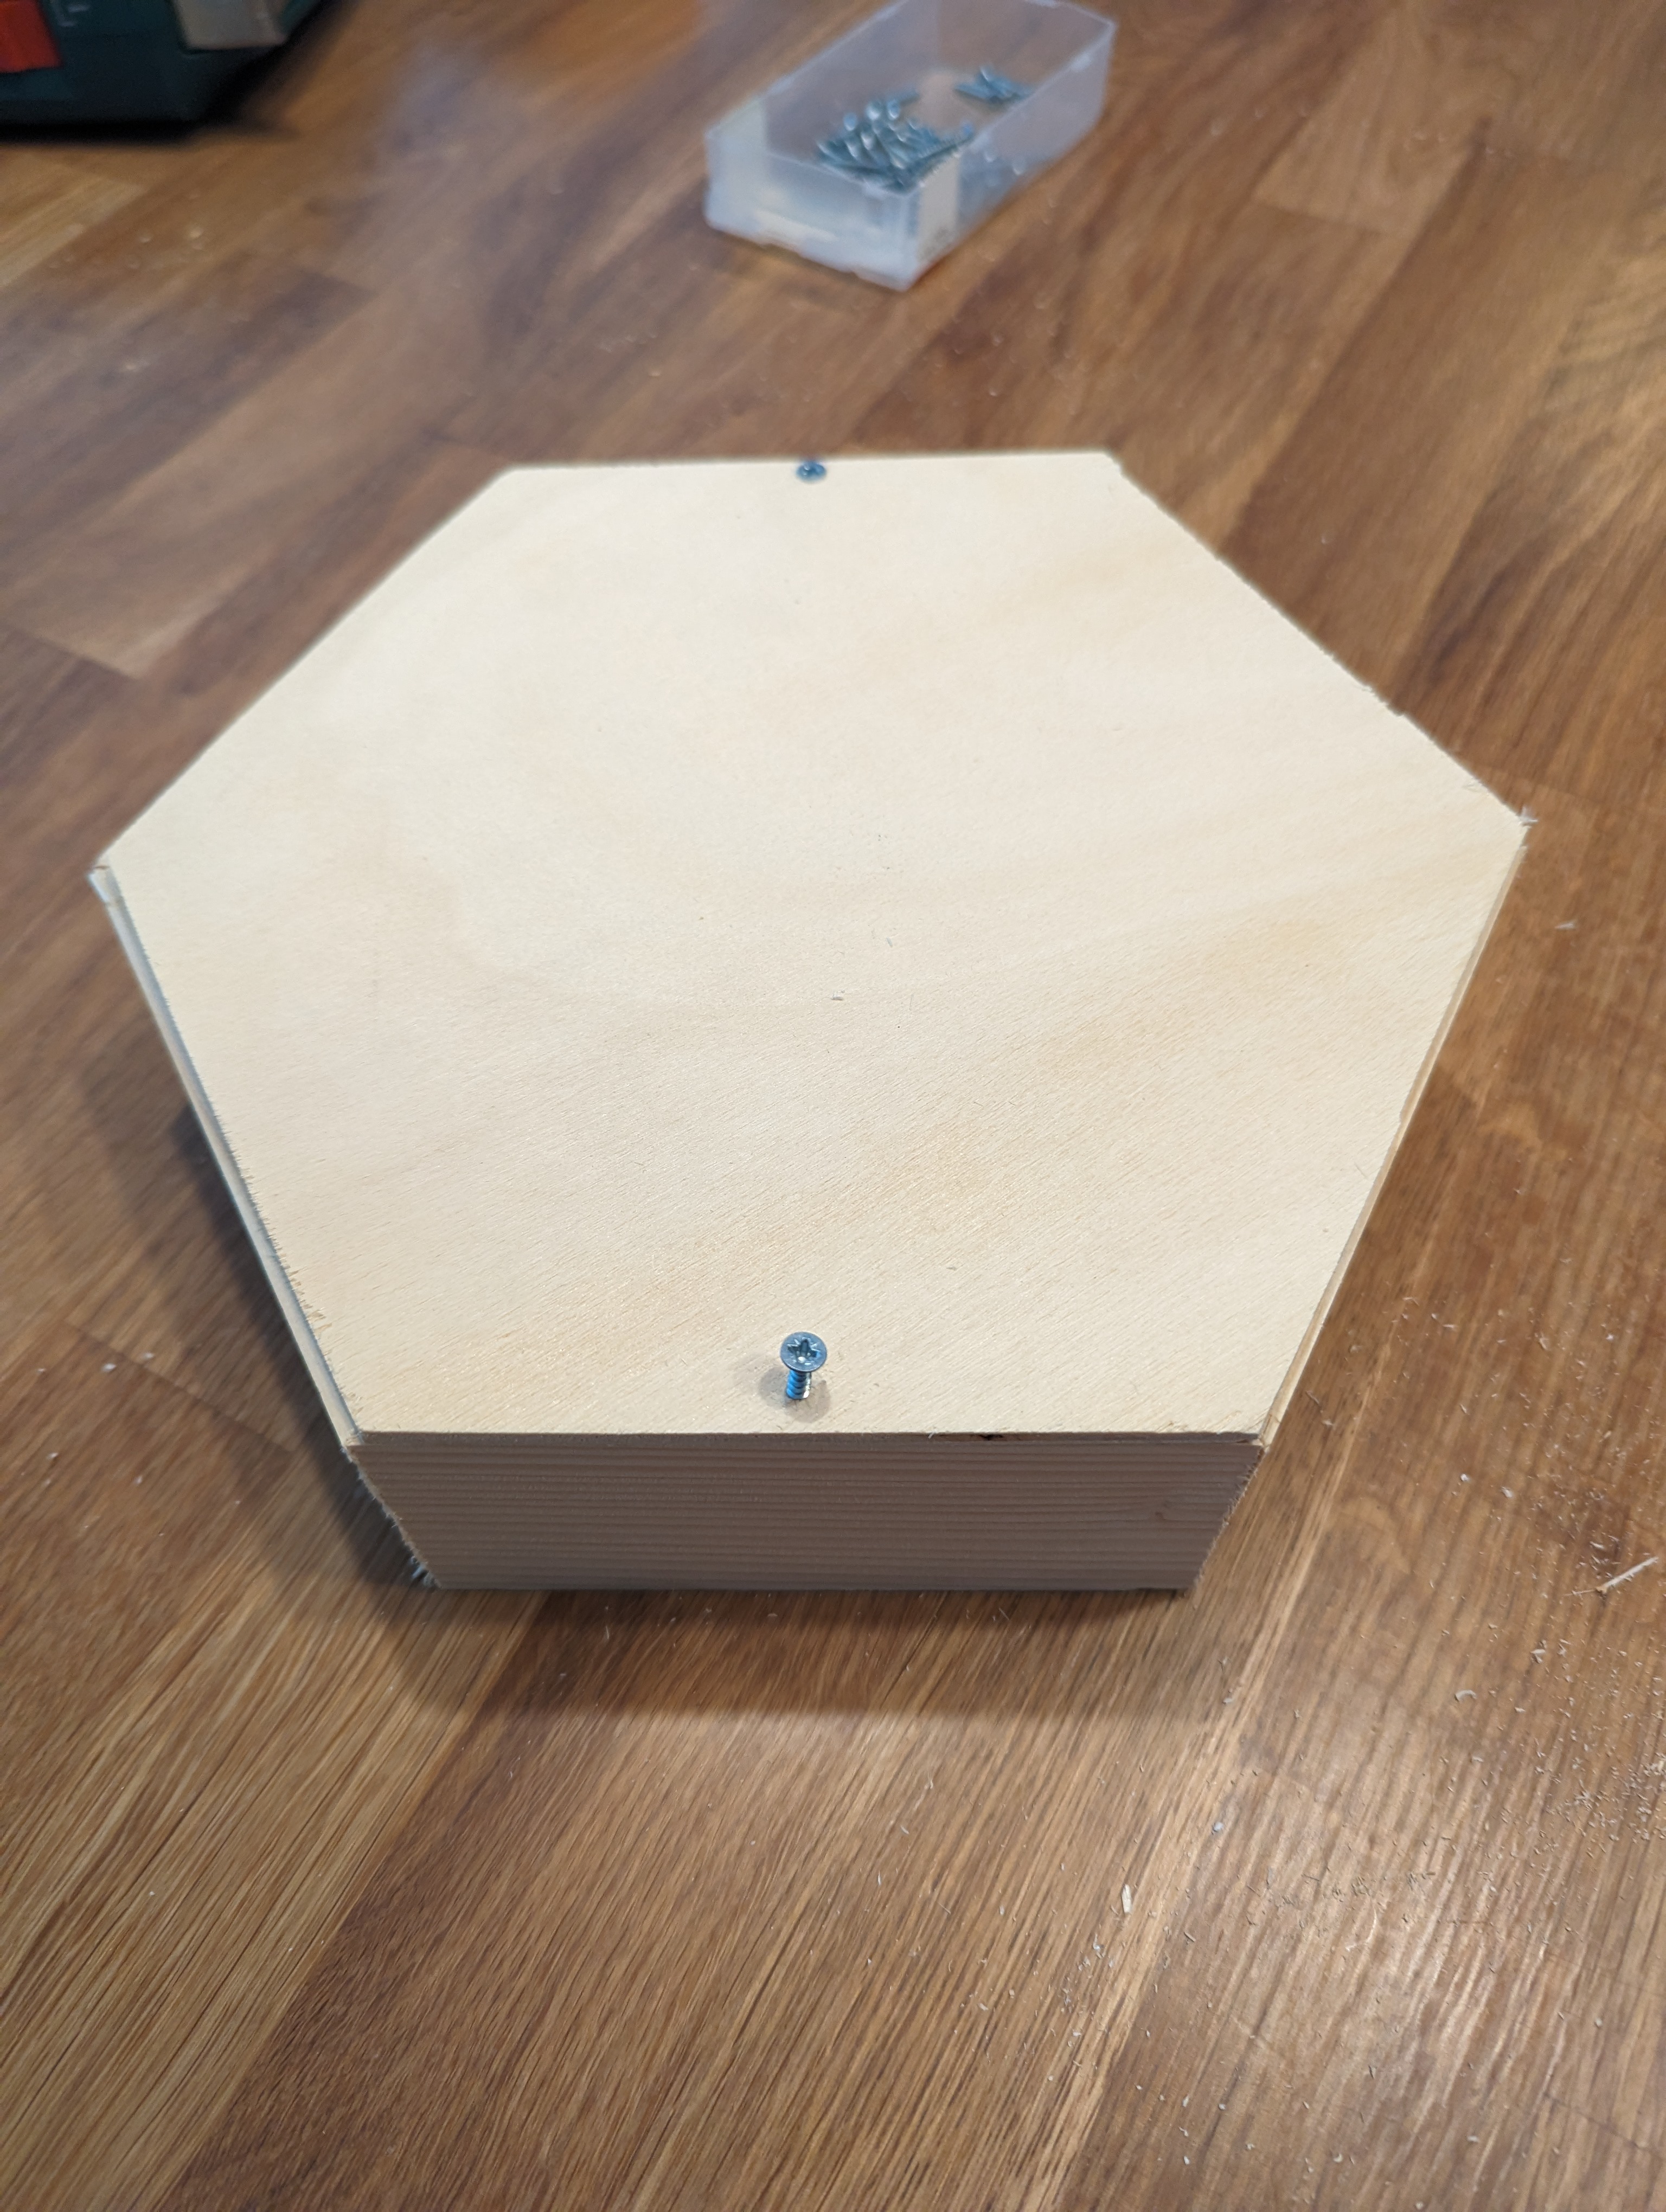
Step 5: Putting it together
Place the backplate onto the hexagon and use glue or screws to keep it in place. In this case I used screws, but glue should be just as good.

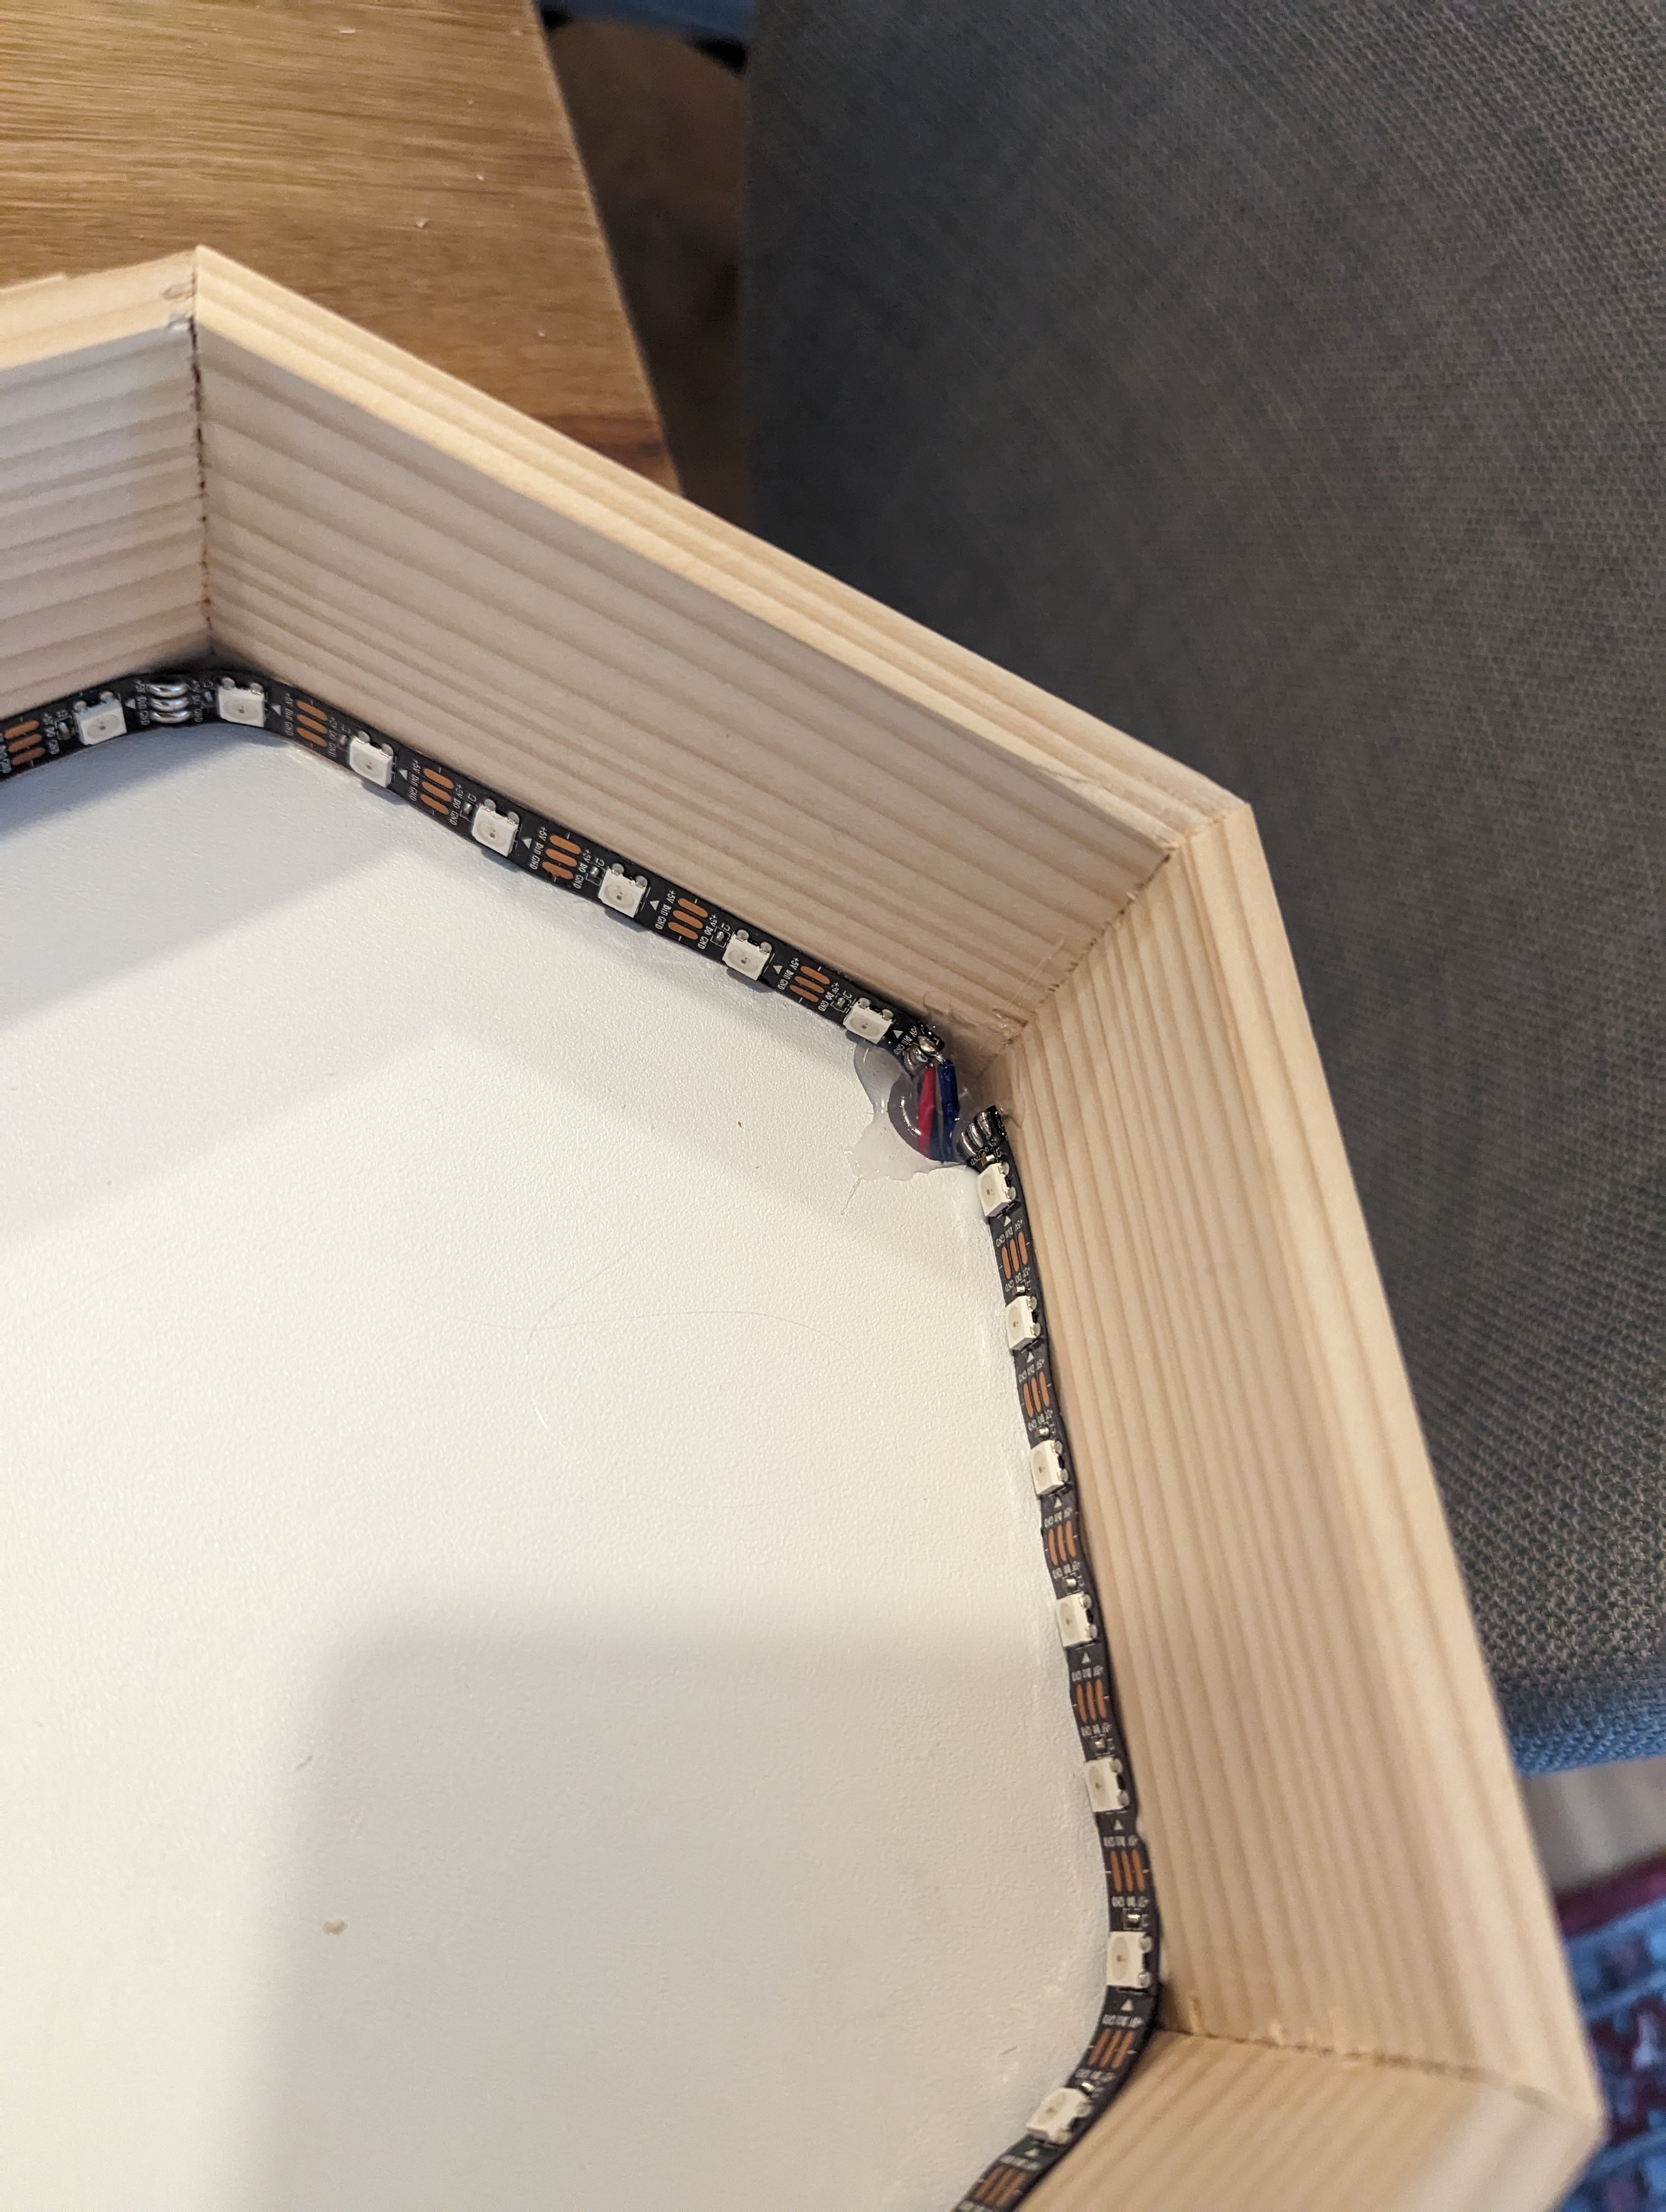
Step 6: Attaching the LED Strip
Depending on how you want to attach the LED strip, cut the WS2812 LED strip to fit. I'm attacking them on the inside of the outer walls, close to the backplate.
In my case I had soldered a female 3-pin JST to the beginning of the strip and a male 3-pin JST to the end, so that I can easily chain multiple hexagons.
I drilled a hold at the corner into the backplate and put the strip through it. Then used wood glue to glue it to the wall.
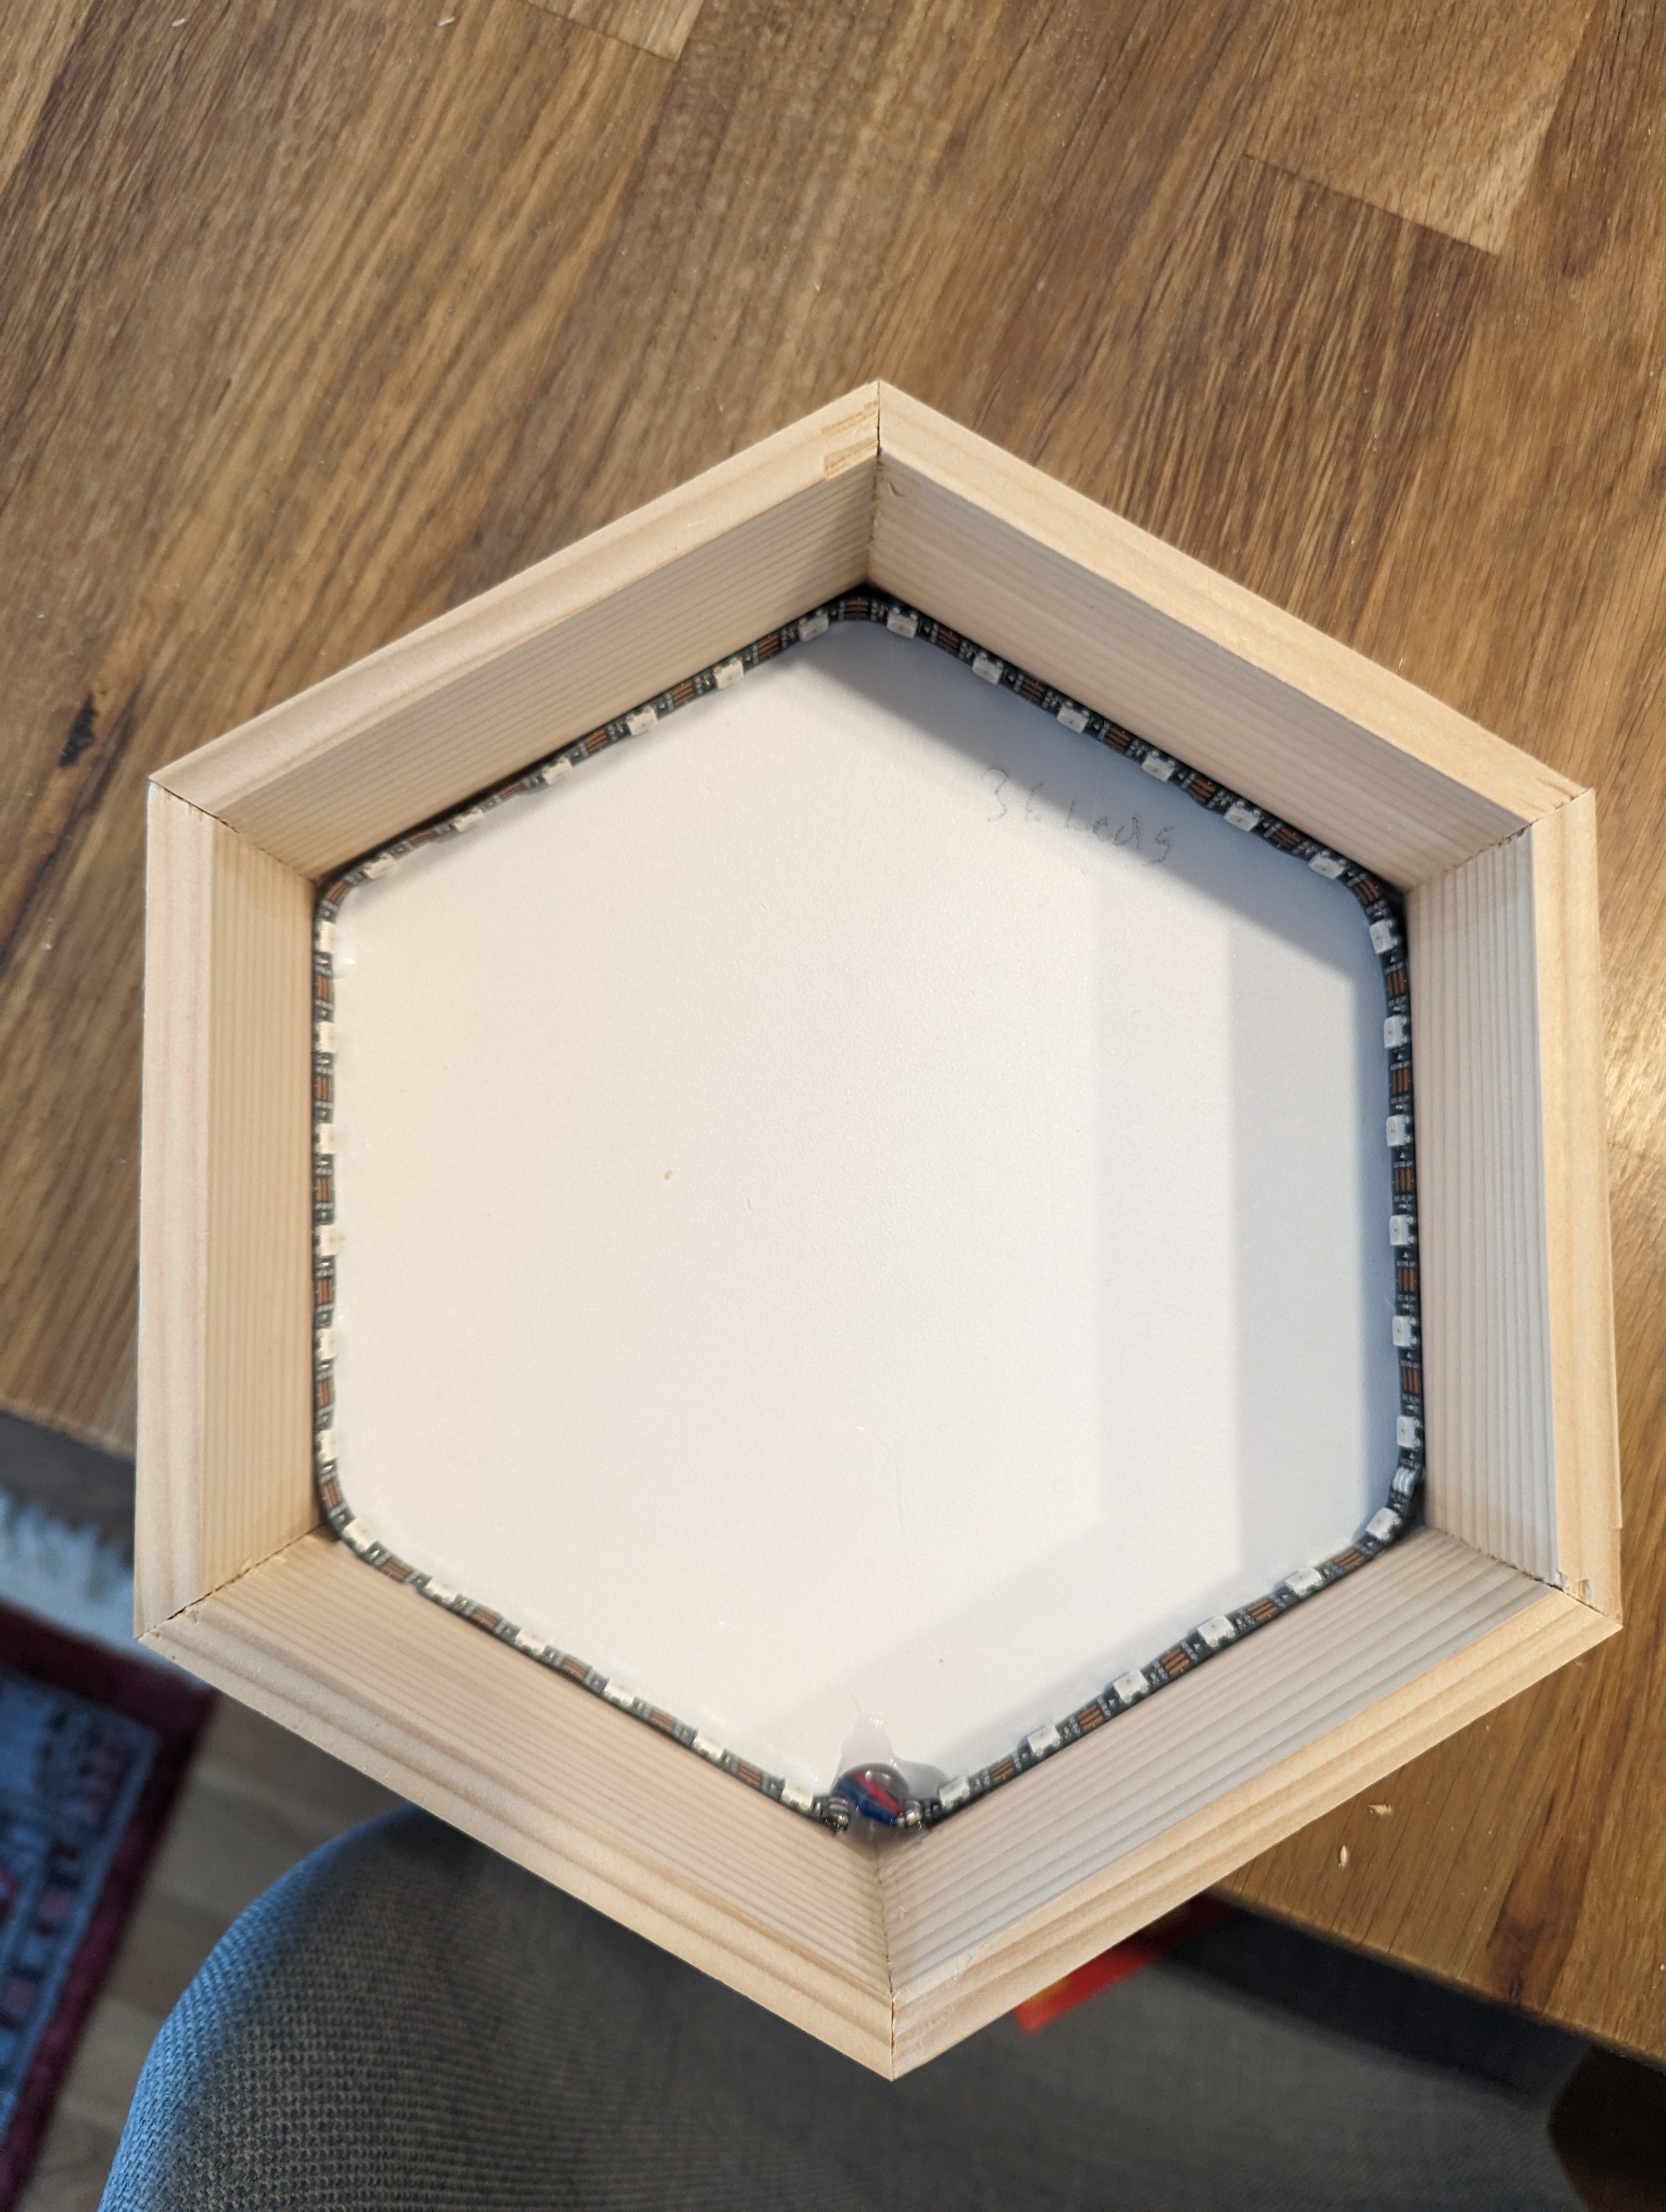
To protect the cables from strain, I added hot glue into the drilling hole.
For the cabling, I drilled a hole near one of the corners and pulled the strip through. Then I used some hot-glue from the inside to fix the cabling in case of strain.
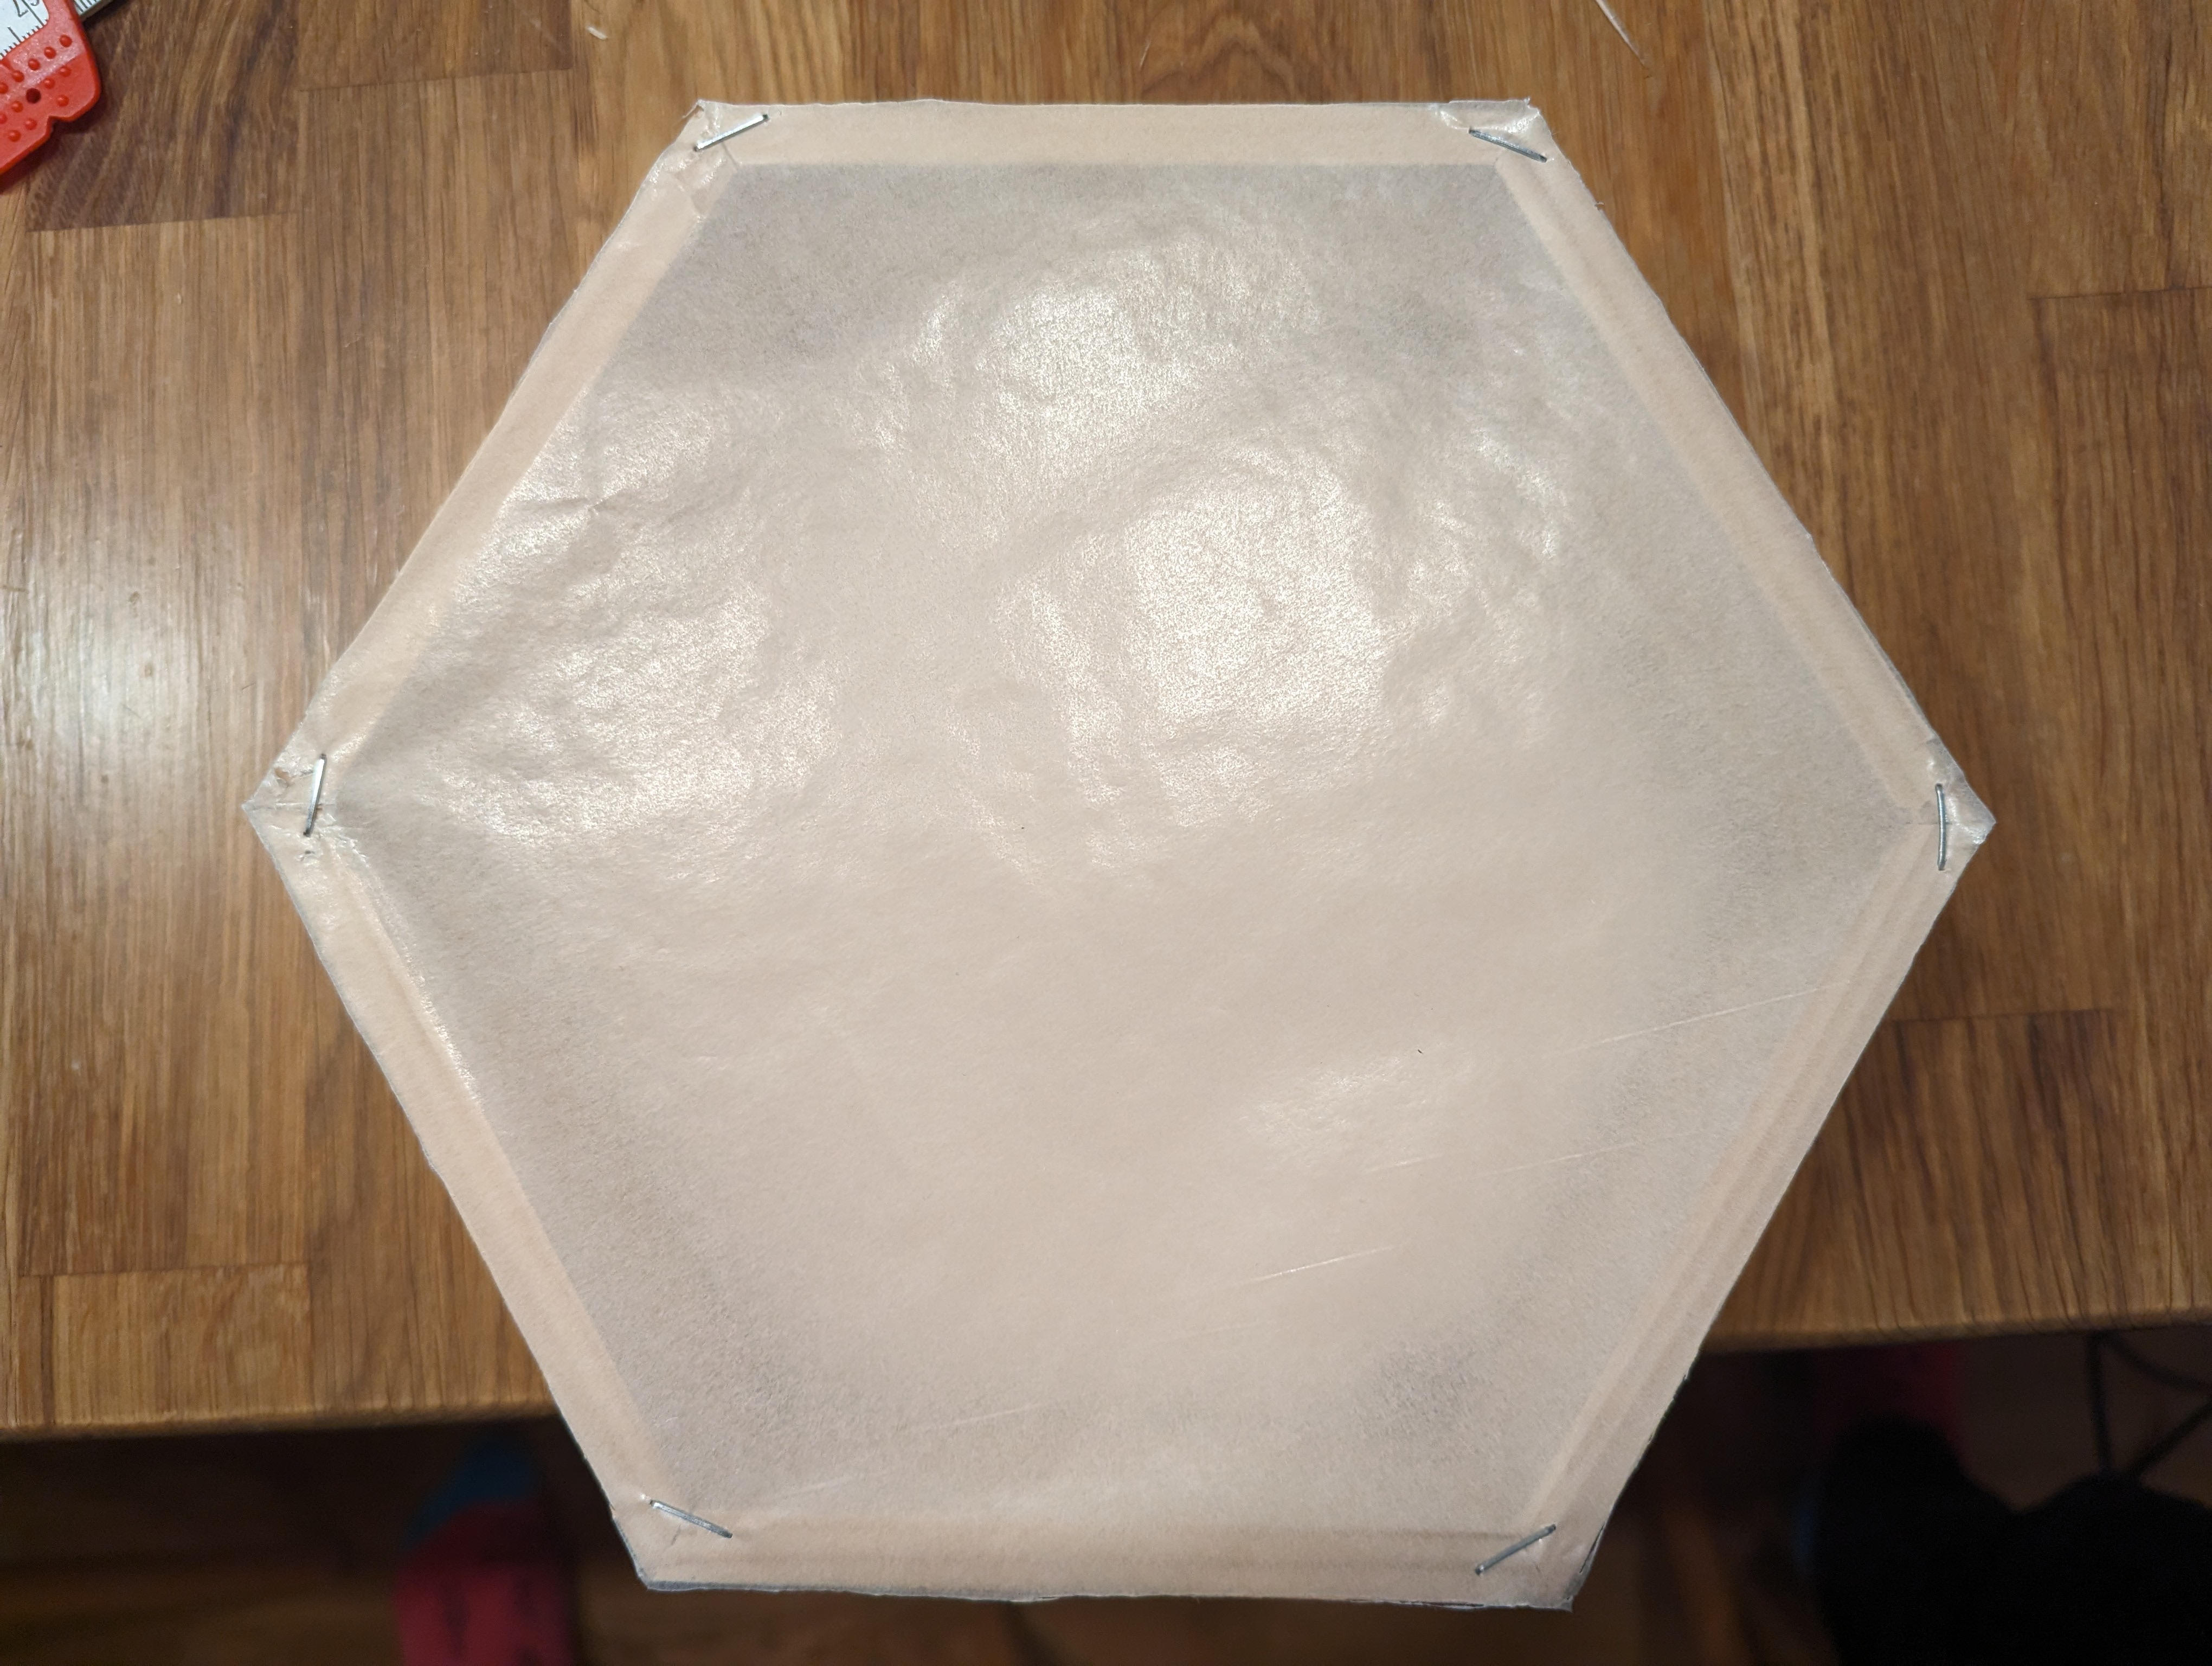
Step 7: Attach matte transparent paper
Attach the electronics to the lattice. Secure all components and tidy up the wiring.
In action
Turn on the power and enjoy the beautiful light patterns of the LED lattice!
