My Personal Projects
LED Lattice Project
- LED Lattice Project
- Introduction
- Materials List
- Tools Required
- List of Woodcuts
- Special pieces
- Construction Guide
- Step 1: Preparing the Wood
- Step 2: Assembling the frame
- Step 3: Assembling the lattice
- Step 4: Putting the frame and lattice together
- Step 5: Attaching the LED Strips to the backplate
- Step 6: Add feet for protection of cables
- Step 7: Putting it all together
- Step 8: Coloring (optionally)
- Step 9: Attach matte transparent paper
- In action
- Content to show?
Introduction
Welcome to the DIY LED Lattice Project! This guide will walk you through creating a stunning LED lattice using WS2812 LEDs and wood. This project is perfect for those who love DIY electronics and woodworking. The finished product will be a beautiful LED lattice that you can use for decorative lighting in your home, office or parties.
Materials List
- WS2812 LED Strips (Ones with ~10cm distance between the individual lights)
- Wooden planks (size depends on desired lattice size)
- I got some from Jumbo that were 240x56x10mm
- Wooden backplate
- I used a plywood plate that is white on one side, 1200x600x4mm
- Screws (for assembling the lattice)
- For the frame: 3x12 screws
- For the rest: 3x20 screws
- Steel L Right Angle Bracket, 90 Degree Metal Joint Corner Braces
- Soldering iron and solder
- Wire (for connecting LED strips)
- Microcontroller
- In my case I'm using a BC-216 Artnet to SPI/DMX Pixel light controller
- 3 pin JST connector
- Acryl spray for coloring the frame (optional)
Tools Required
- Saw (for cutting wood)
- Drill
- Wire cutters and strippers
- Computer with an Artnet souce
List of Woodcuts
| Amount | Dimensions | Used for | Description |
|---|---|---|---|
| 1 | 600x410x4mm | Backplate | Backplate where the LEDs are fixed on |
| 2 | 410x56x10mm | Frame horizontal | Plain piece |
| 2 | 590x56x10mm | Frame vertical | Plain piece |
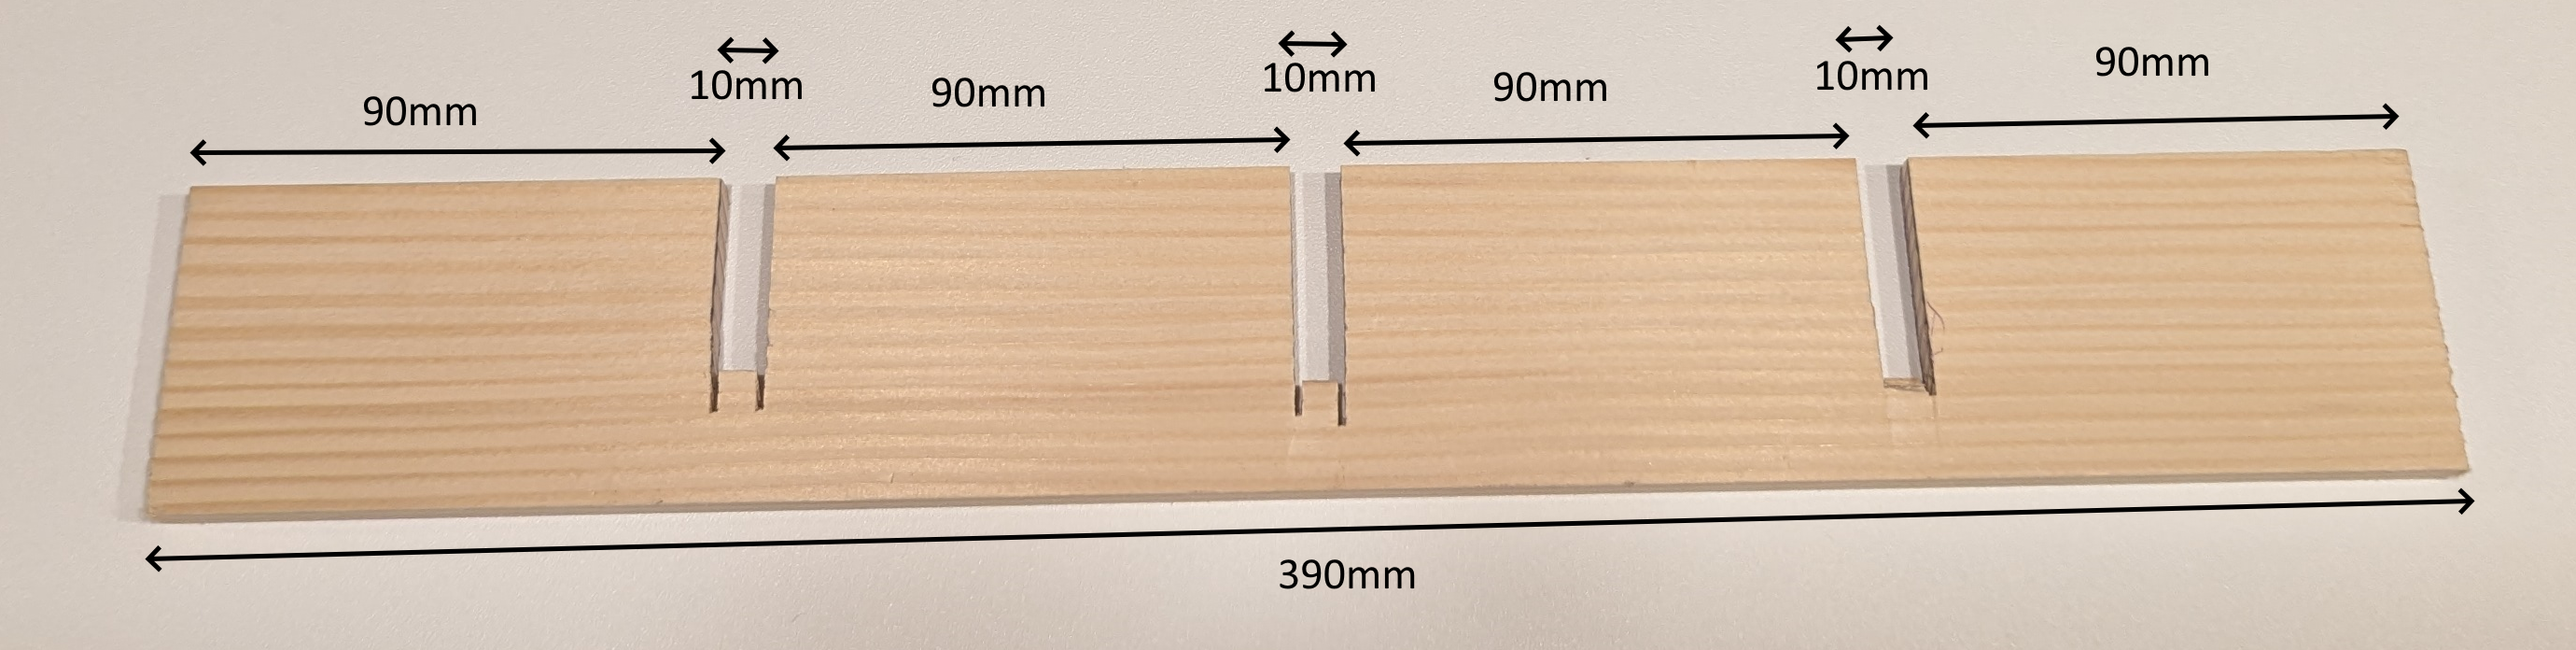
| 3 | 590x56x10mm | Lattice horizontal | Piece with 3cm deep and 1 cm wide cut every 10cm in the wood. See special pieces section below |
| 5 | 390x56x10mm | Lattice vertical | Piece with 3cm deep and 1 cm wide cut every 10cm in the wood. See special pieces section below |
Special pieces
Lattice horizontal

Lattice vertical
Backplate

The measurements of the backplate before doing any sawing.

The backplate after cutting and drilling the holes.
Construction Guide
Step 1: Preparing the Wood
Based on the pieces list, prepare all needed cuts to assemble the lattice.
To improve the througput I worked with templates that I created and used on the long planks to draw the cuts. One has to be careful to calculate the width of the saw blade, in order to have consistency in the length of the pieces.
I would recommend you cut all pieces before you start with any further steps.
Step 2: Assembling the frame
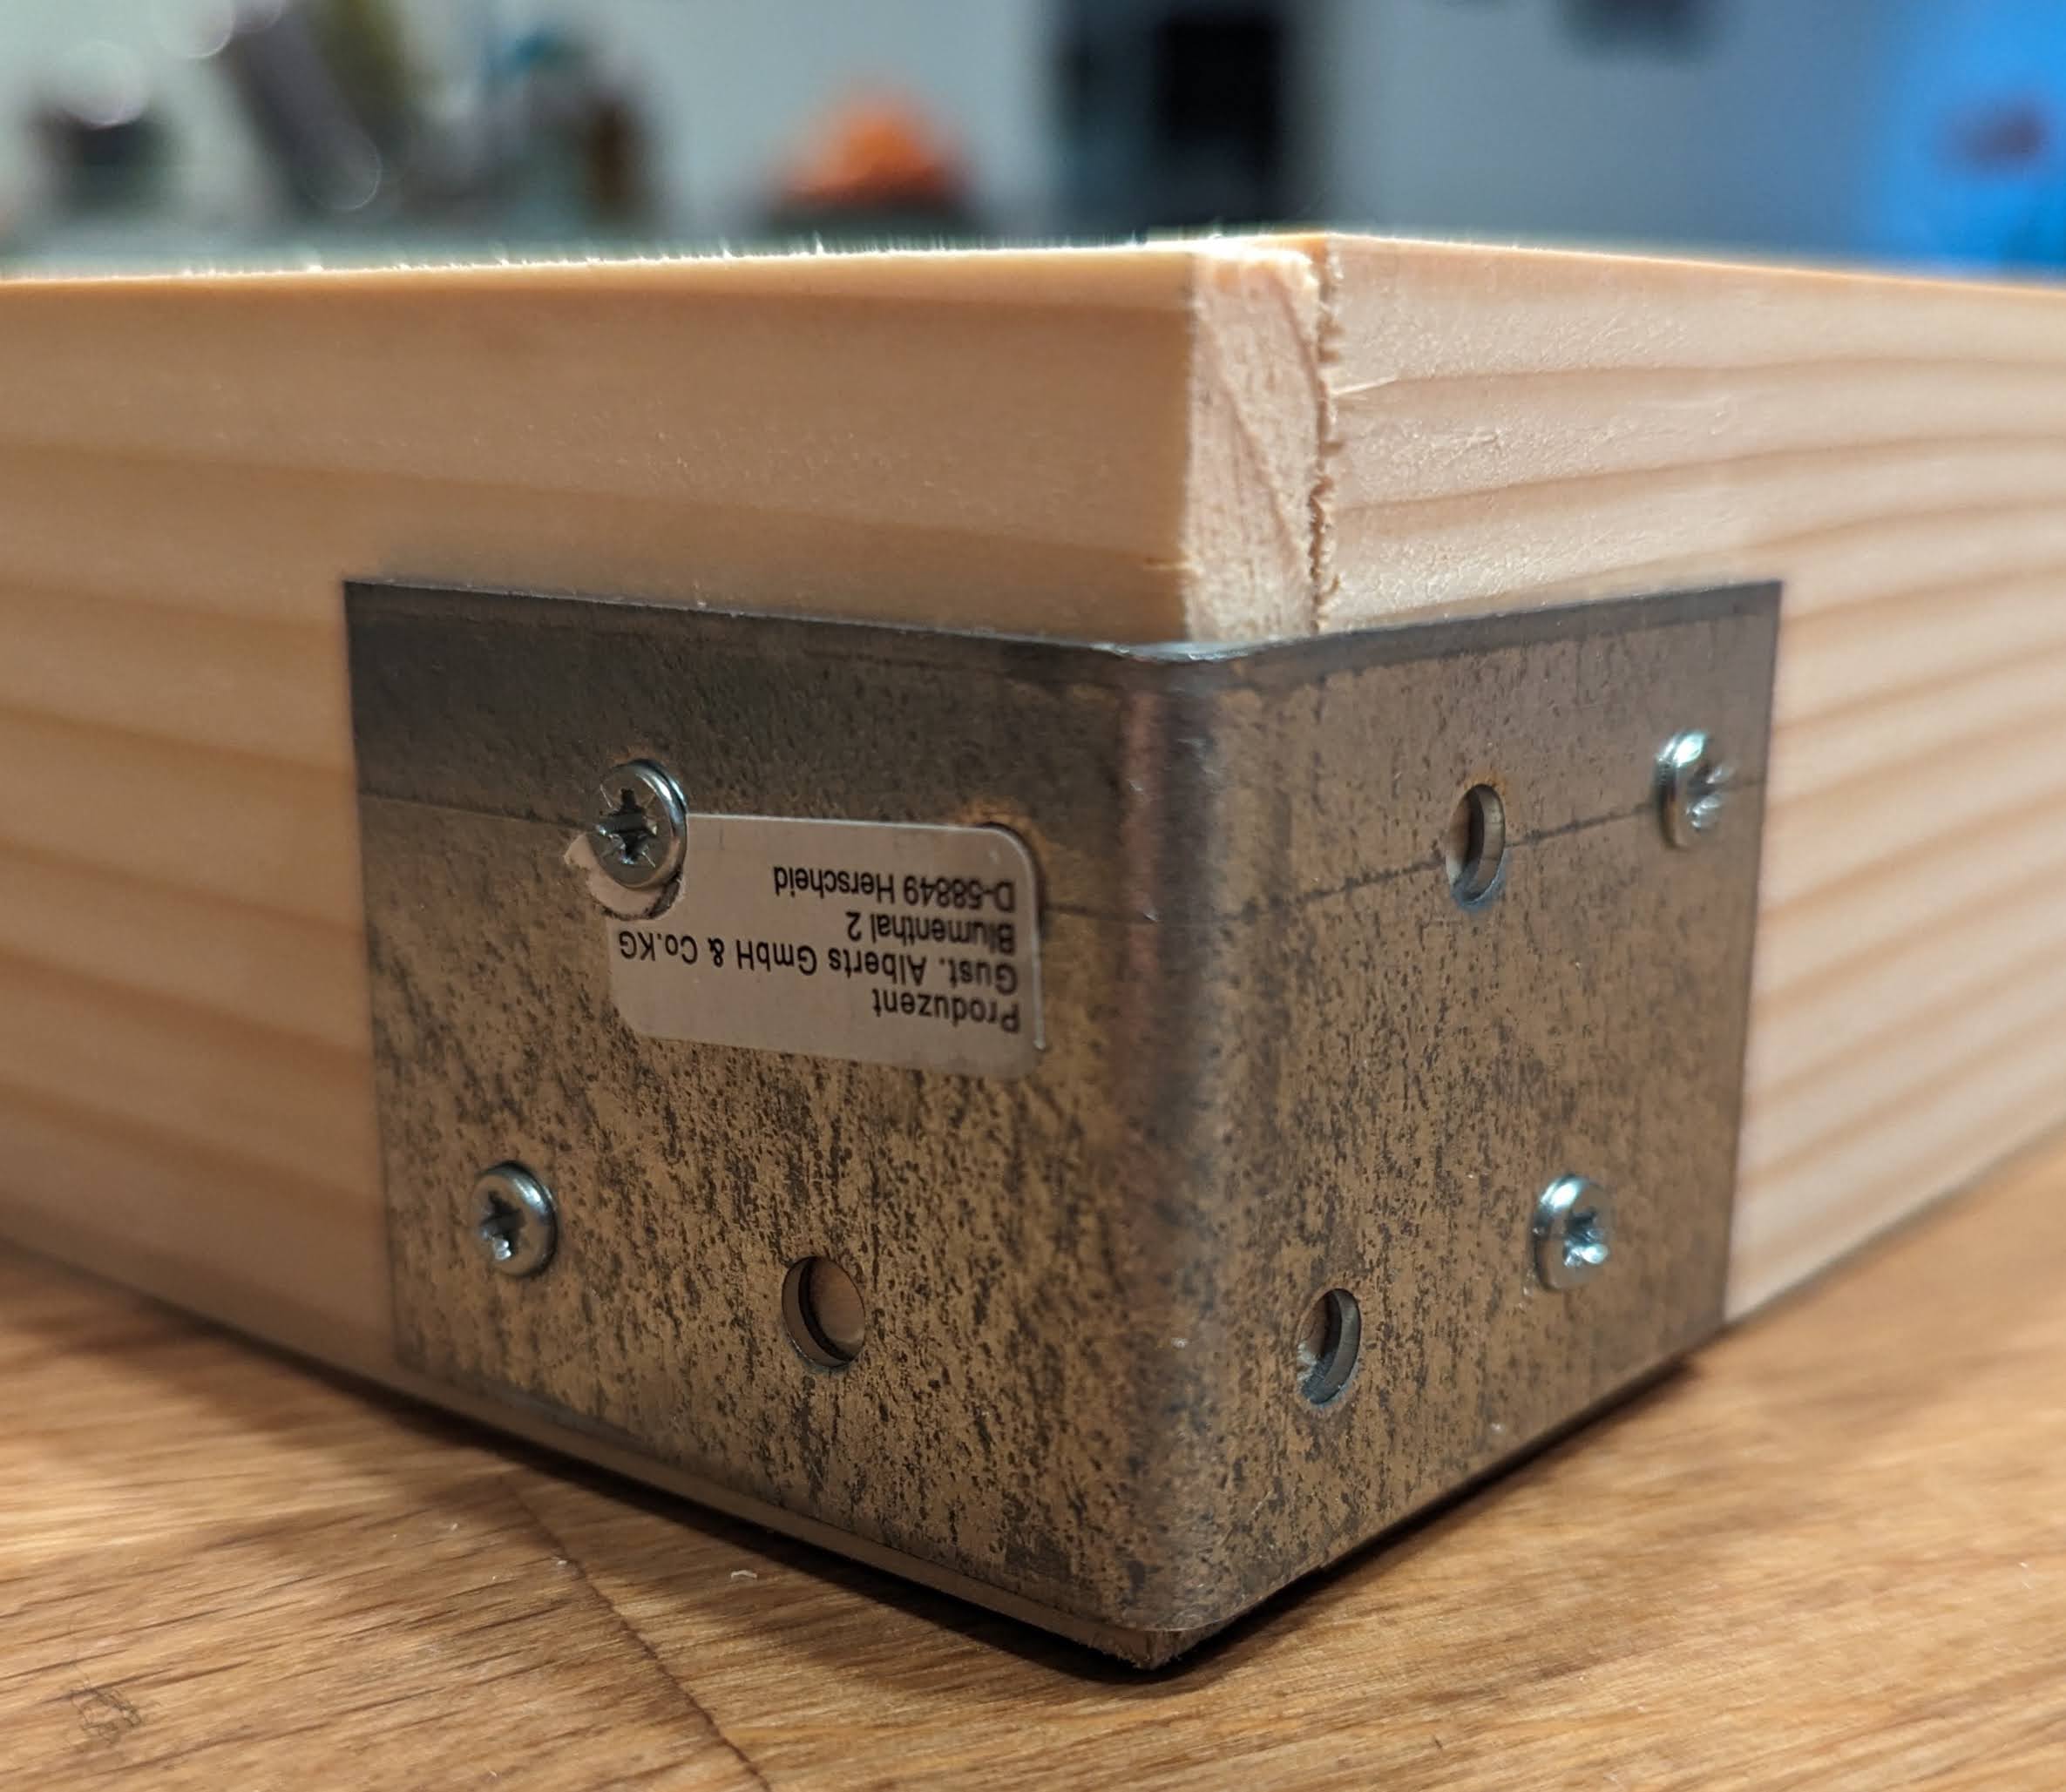
Assemble the wooden planks cuts that will form the frame together on the corners using the steel L right angle brackets. Use the 3x12 screws to not have screw ends hanging out into the lattice.

Step 3: Assembling the lattice
Assemble the center lattice by pushing the cutouts into each other. If you did the cutting properly following the plan, this should be a rather easy task.

Step 4: Putting the frame and lattice together
Assemble the center lattice by pushing the cutouts into each other. If you did the cutting properly following the plan, this should be a rather easy task.

Wait with screwing them together until the backplate is also finished.
Step 5: Attaching the LED Strips to the backplate
The 12mm holes should be just a little big bigger than the 10mm LEDs with the soldered on connections.
Place them into the holes whole having the wooden side facing up and use hot-melt adhesive (hot glue) for easy attachement.

In order to fix the LEDs in the holes while applying the glue, I taped duct-tape over the holes on the white side of the backplate. This held the LEDs in place (kind of 😁).

In progress. I used a third hand to keep the light in place while waiting for the hot glue to cool down.

Finished product. I applied further hot glue around the cable to protect it from strain.
Step 6: Add feet for protection of cables
In order to protect the cables when having the installation on the floor or hung up on a wall, I added small 50mm feet to the back of the backplate.

These are the feet on the finished and painted version.
Step 7: Putting it all together
Place the frame, lattice and backplate together. Use the 3x20 screws to fix the frame to the lattice by applying screws on all sides through the fram into the lattice.
Also screw throught the backplate into the lattice.


Testing it out 🥳
Step 8: Coloring (optionally)
I decided to color the outside of the lattice black to make it not stand out too much on a dark dance floor.


Step 9: Attach matte transparent paper
Attach the electronics to the lattice. I used a stapler gun to fix it to the lattice.

In action
Turn on the power and enjoy the beautiful light patterns of the LED lattice!

Content to show?
In order to have some specific conent for the lattice, I wrote some GLSL that can be found in my other repository: Fauli/shaders